


After the initial setup of your TV Box, you will be automatically signed in to the MonacoTelecomTV application.
To use your TV Box, it must be connected to the Internet on your home network (see “First installation” > “Initial setup”).
Turn on your TV Box using the power button on the supplied remote control. After a brief moment, you will be automatically signed in.
If you experience any issues, make sure your television is turned on and correctly connected to your TV Box via the HDMI cable (see “First installation” > “Initial setup”).
The operating status of your TV Box is indicated by the LED light. The LED light will be white when the device is powered on and red when in standby mode.
The TV Box is in the initial setup process when the LED light is white and for approximately 60 seconds after powering on the device from deep standby mode. If you power it on from active standby mode, the device should be operational after approximately 10 to 15 seconds.
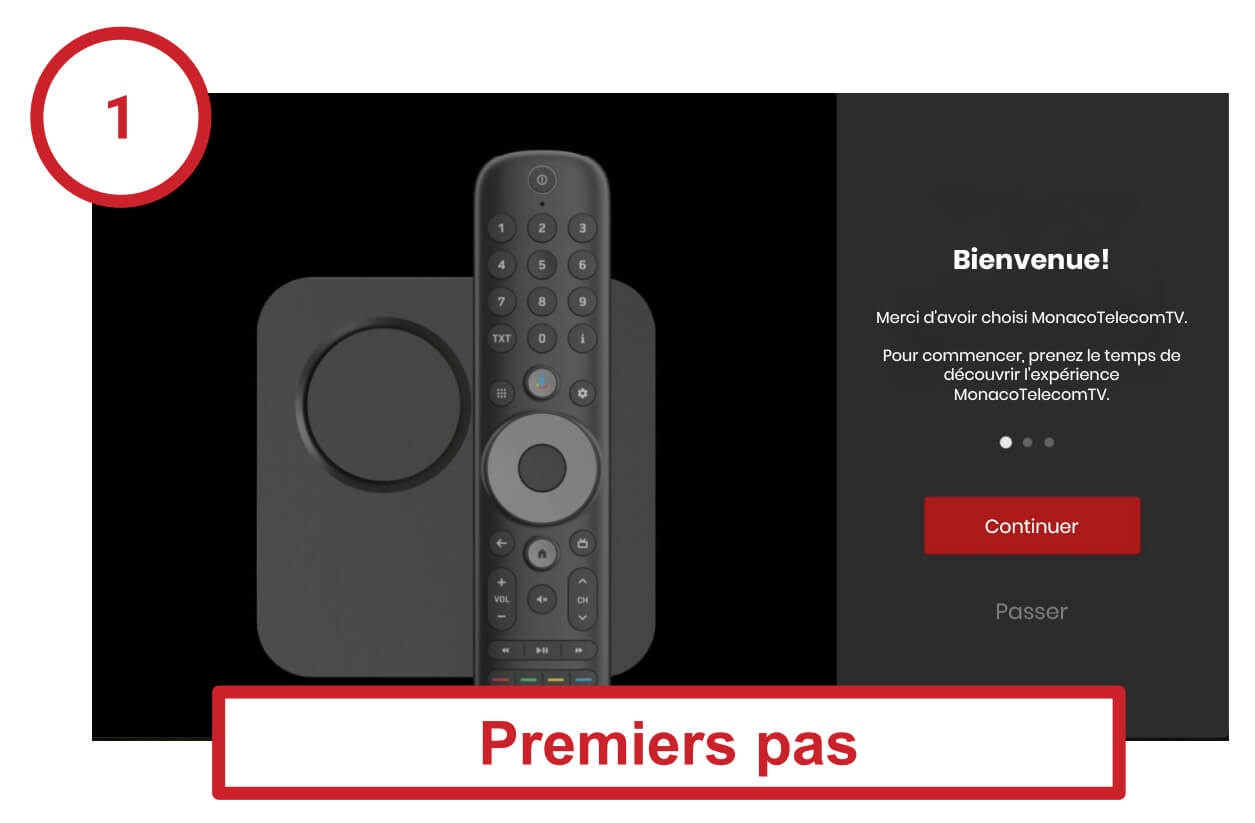
After signing in to the MonacoTelecomTV application, you will be guided through a virtual tour to help you become familiar with the key features of the remote control.
Follow the on-screen instructions to complete the tour.
For a quick overview of all the remote control functions, see “Remote control”.
Once the tour is complete, you can start enjoying MonacoTelecomTV.
Main controls, navigation and selection
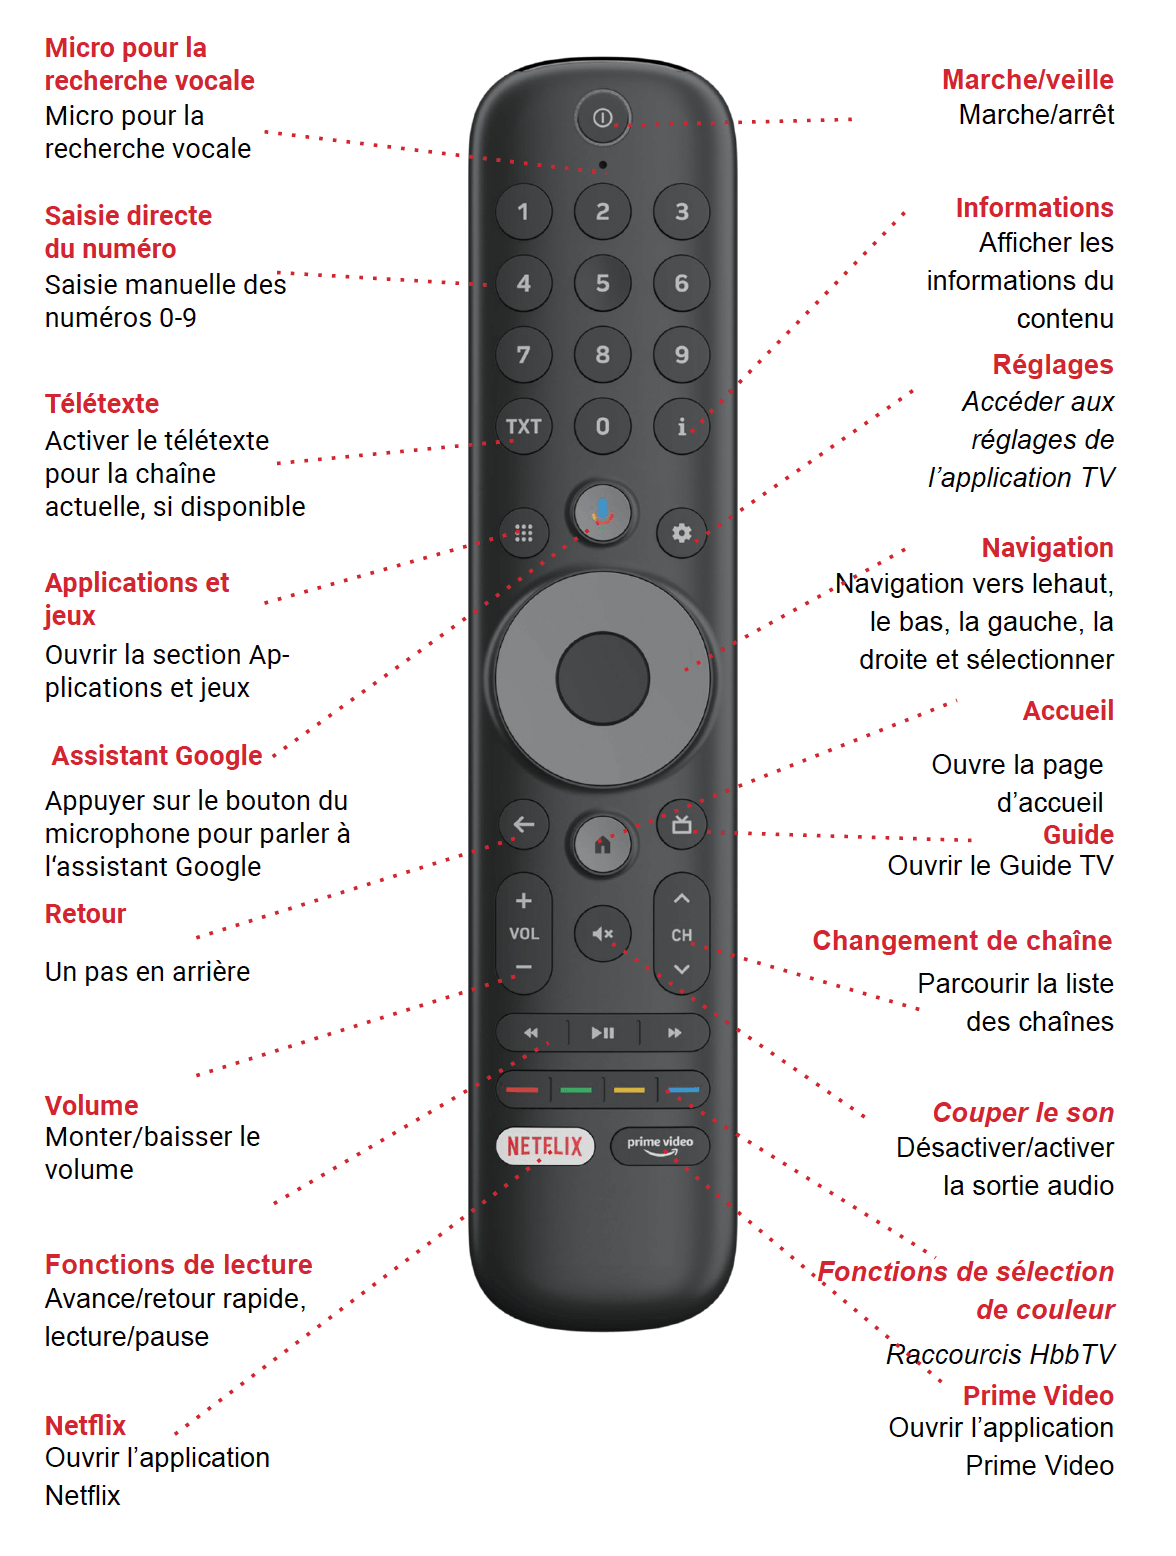
The remote control features built-in Bluetooth, so you do not need a clear line of sight between the remote control and the TV Box.
After the initial setup and each time you turn on your Apple TV, it will start directly in TV mode on the last channel you were watching.
User guide:
Search: Search for a TV channel or programme by entering the programme or channel name using the on-screen keyboard or with Siri (if the feature is enabled).
Home: View all available content.
Replay: Access replay programmes up to 7 days after their initial broadcast.
Live: Watch live TV programmes currently being broadcast.
• Swipe up or down to change channels.
• Swipe to the right to display a vertical channel grid with the channel list.
• Swipe to the left to display the mini EPG with the list of past, current, and upcoming programmes.
• Press the central button on the directional pad during playback to display the control bar at the bottom of the screen. From there, you can pause the live programme, rewind, record it, change the audio channel, or add subtitles if available.
Channels: Select the desired channel. Channels are grouped by category.
TV Guide: View past or upcoming TV schedules. TV programmes can be selected to be watched on replay (depending on broadcaster rights).
Recordings: Watch or delete your recordings.
Favourites: Manage your favourite channels and programmes.
Settings: Manage your audio and video settings, as well as sign out of your account.

Under “Live”, all available channels and the programmes currently airing are listed in a vertical column on the right-hand side of the screen. Next to the channel logos, the programmes currently on air are displayed.
Using the navigation buttons, you can browse through the channel list and select the next channel. Confirm your selection and switch channels by pressing the OK button.
See “Changing channels”
You can also limit the channel list to your favourite channels.
To do this, press the right arrow “→” button on the navigation pad of your remote control while watching TV. You can choose to display all channels, a channel category, or only your favourite channels.
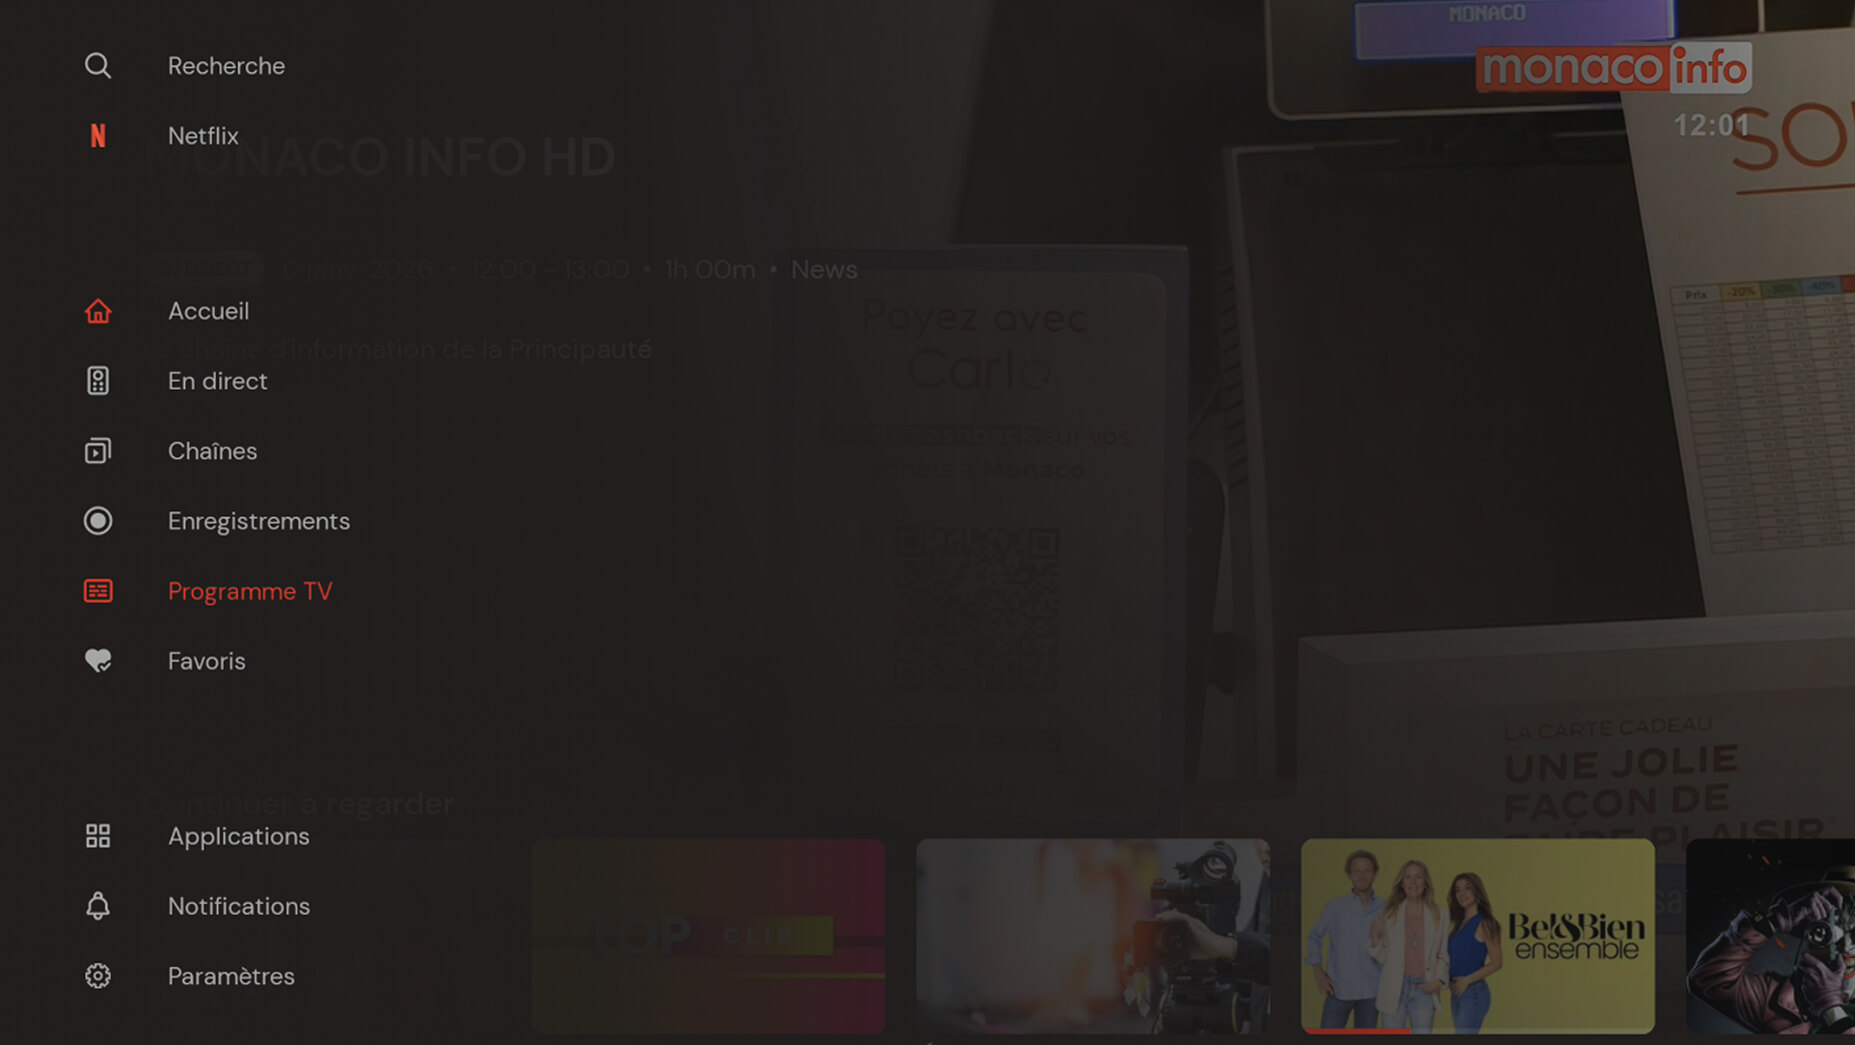
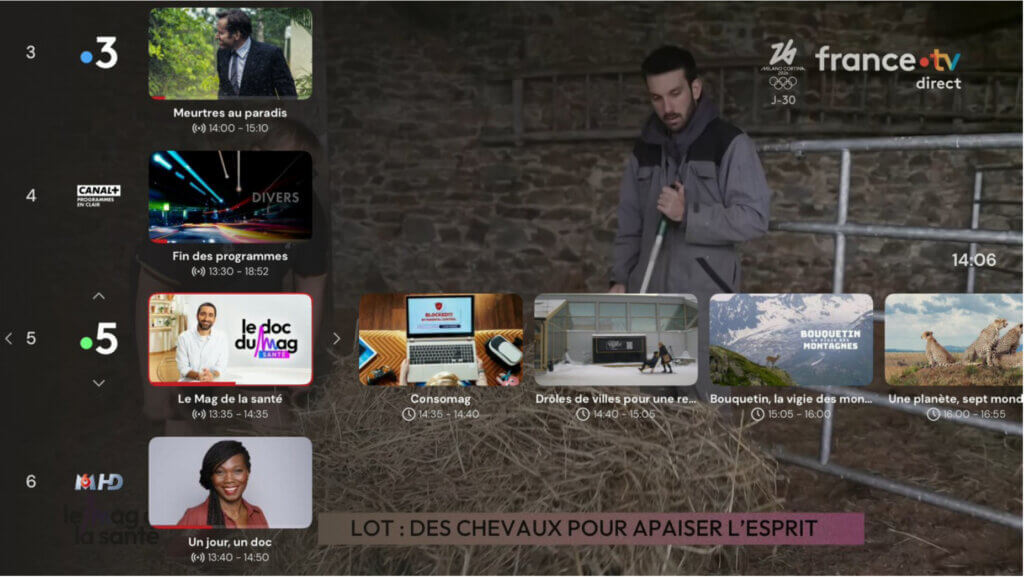
You can open the TV Guide via the main menu.
It lists all available channels and displays the available programming along a timeline. You can also open the TV Guide directly using the GUIDE button on the remote control (see “Remote control”).
In the TV Guide, you can access the desired channel and start watching its programme. In addition, each programme is accompanied by a brief description.
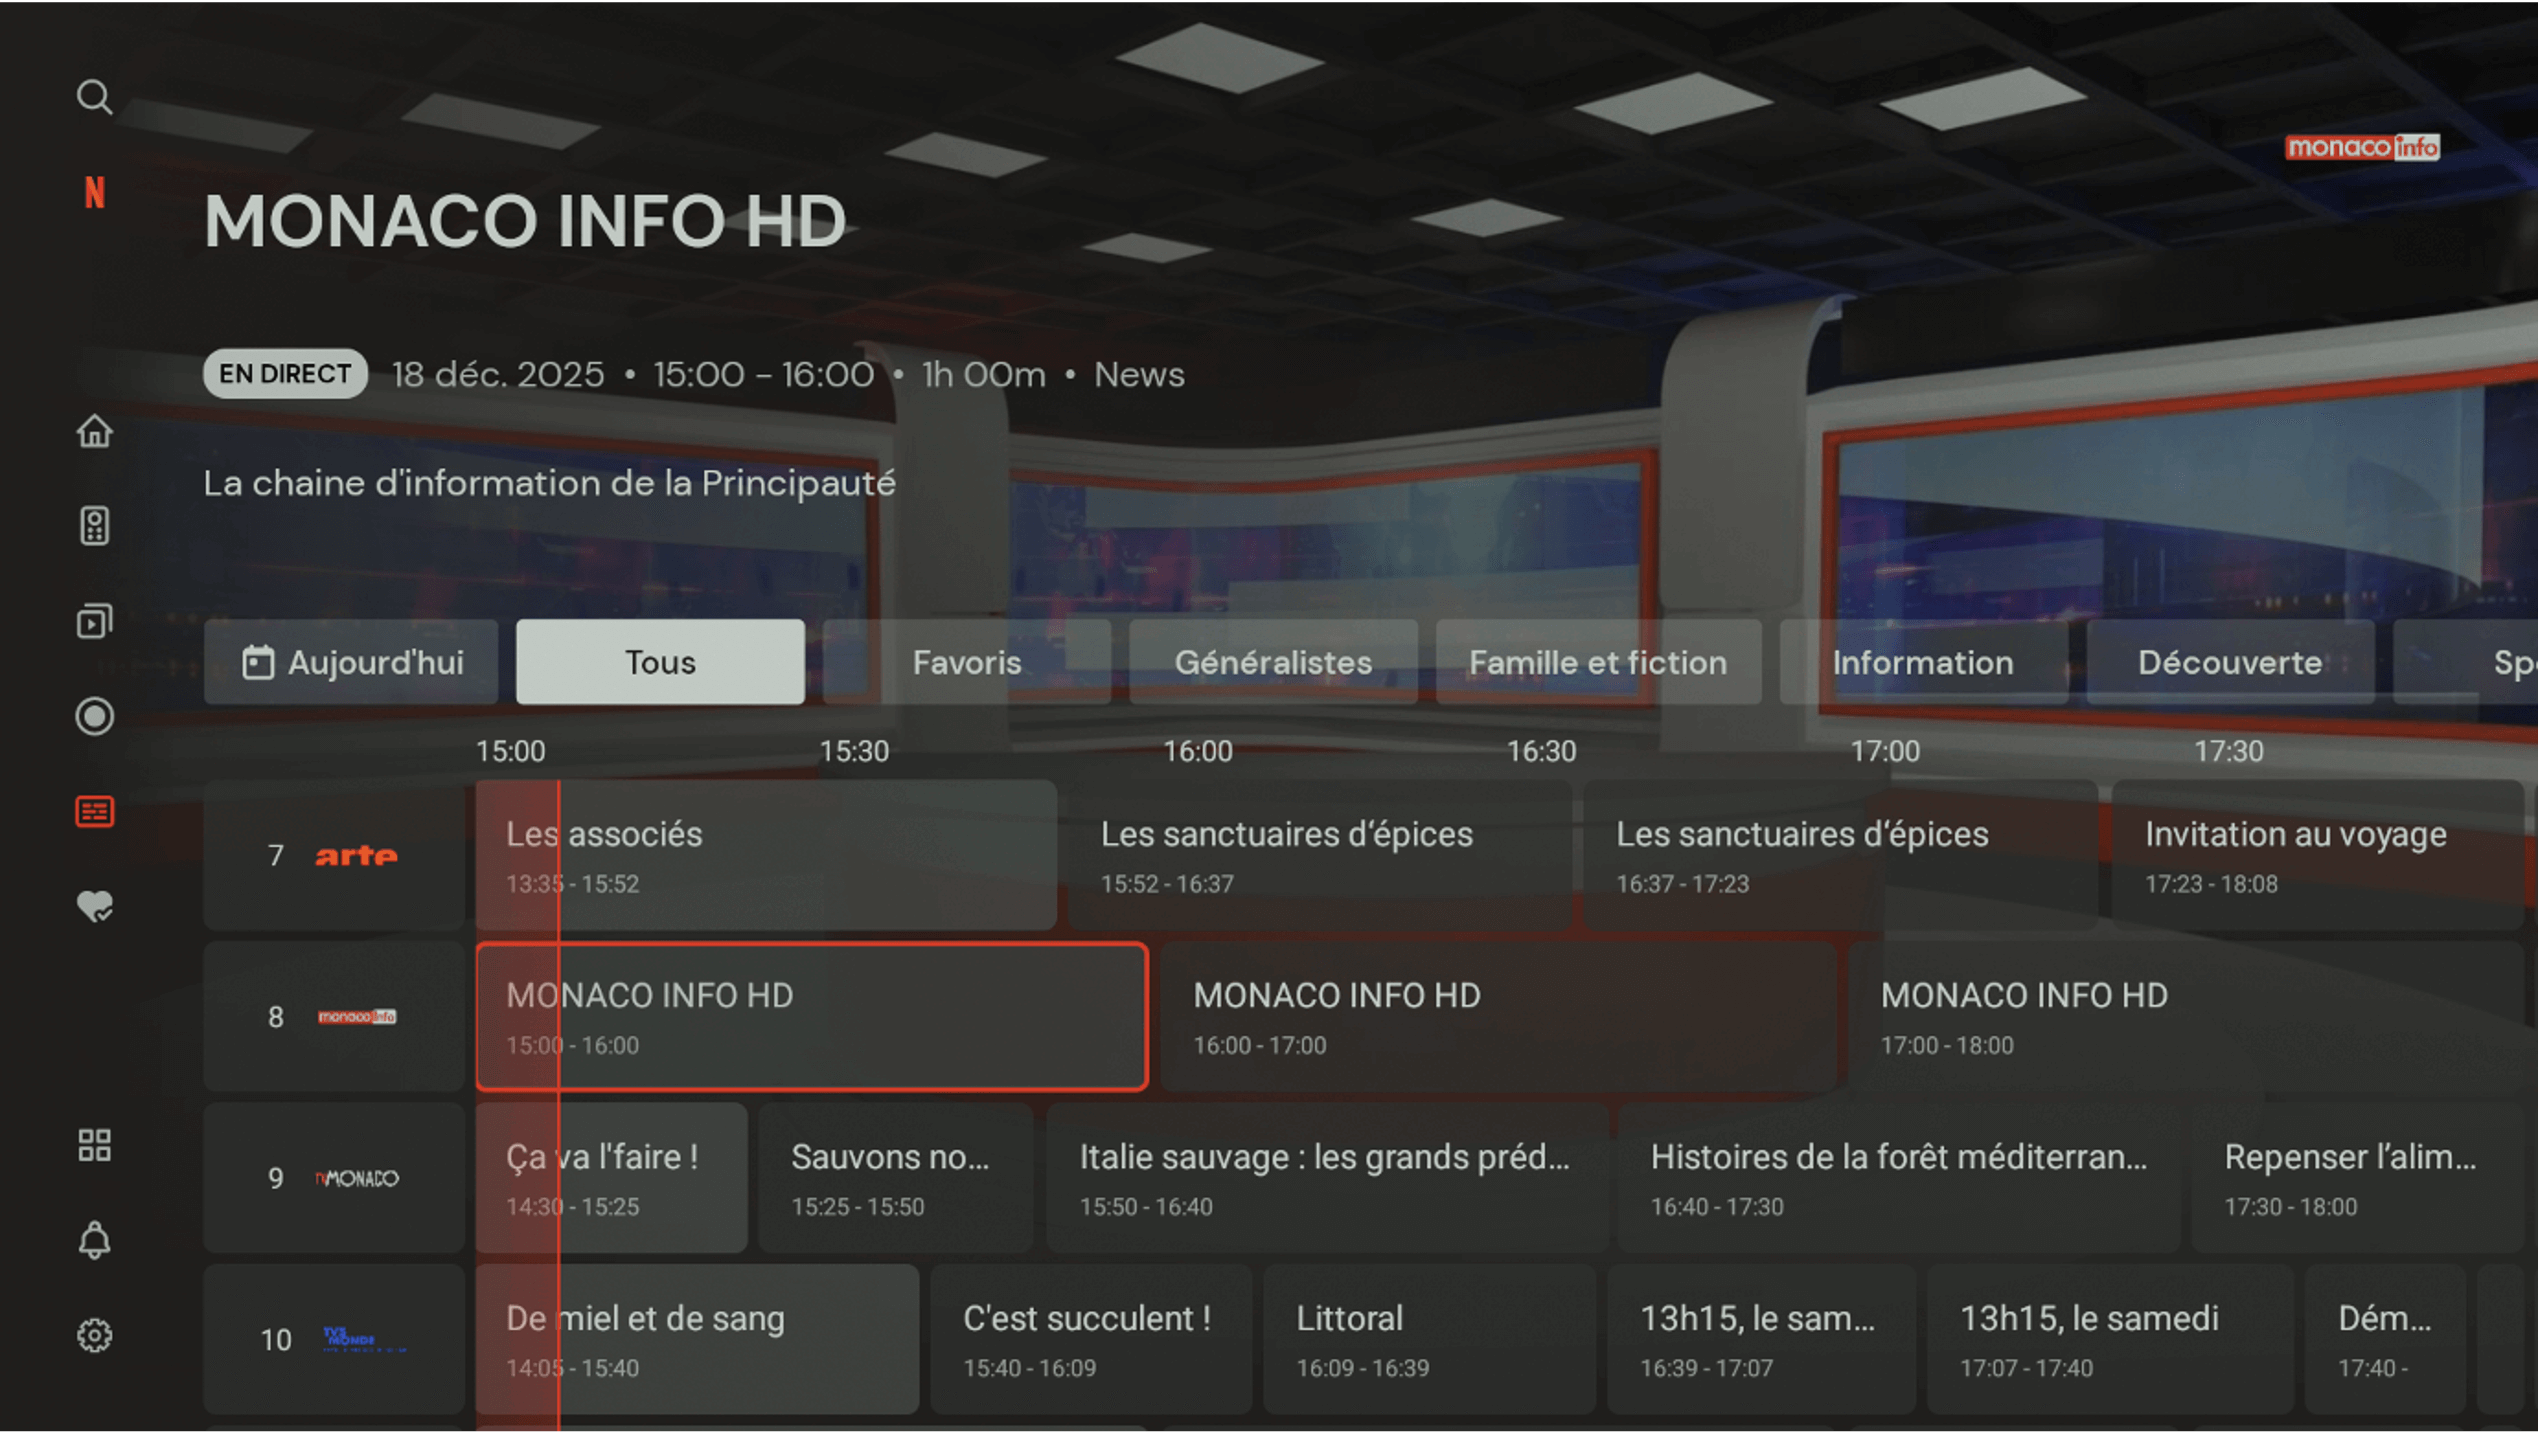
The guide displays past, current, and upcoming programmes, including titles, start times, and durations.
The programme schedule is displayed on a timeline in 30-minute increments, with the coloured line indicating the current time.
The channel and favourites list is represented by the channel number and logo.
You can switch the TV Guide view between “All”, “Favourites”, or choose from the channel categories.
You can use the direct number entry buttons on your remote control to jump directly to the programme of a channel you are interested in.
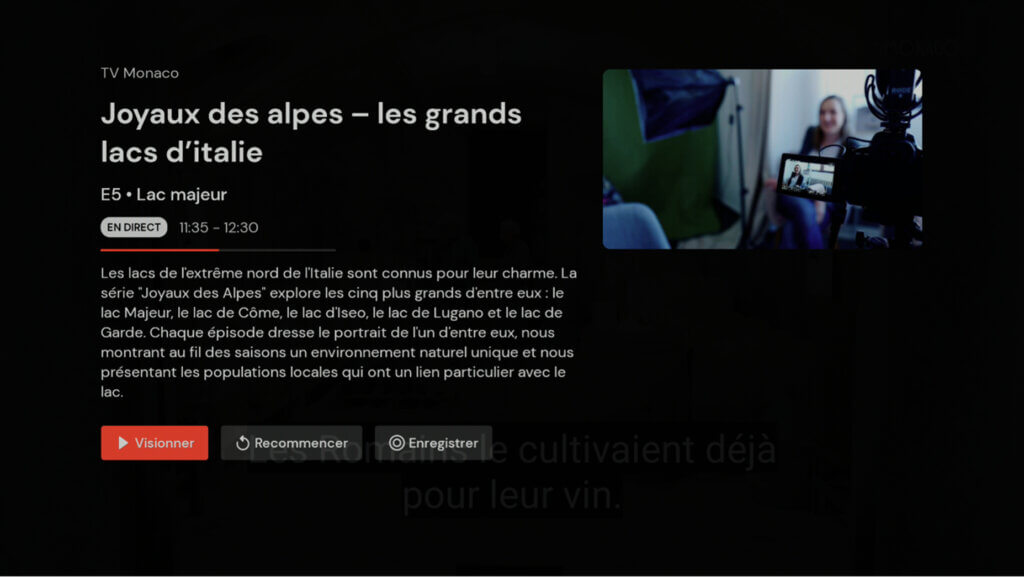
The programme details page includes the channel name, the programme title and, where applicable, the episode title, as well as the date, start time, and end time of the programme.
The programme details page includes the channel name, the programme title and, where applicable, the episode title, as well as the date, start time, and end time of the programme.
In addition, detailed information about the programme—such as the year of production, country, duration, and content—is provided.
Some programmes may include additional information, such as the cast and the director, hidden under the Details button.
In the programme information view, you can also:
- Watch: Watch programmes by pressing the
 play button.
 - Restart: If available, watch programmes from the beginning using

- Record: Record programmes by clicking the
 button.

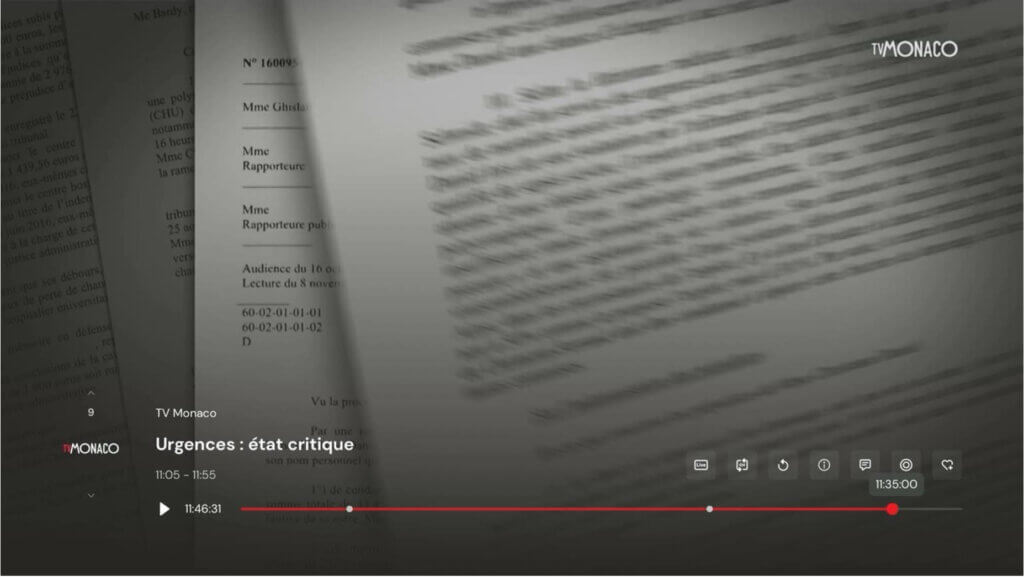
Once you have selected a programme, playback starts. Various control options are available during playback. From the left, the player displays the channel logo with its number.
In addition, the channel name, the title of the programme/film currently playing, and its duration are displayed.
Below, a progress bar allows you to rewind. The white dots indicate the start of a programme and allow you to jump back to specific moments in the content. On the right side of the player, there are buttons that allow you to customise the programme/film currently playing.
Buttons:
1 : Stop time-shift control and return to live TV
2 : Return to the previous channel
3 : Watch a programme from the beginning (replay/restart)
4 : Programme details
5 : Select language and subtitles
6 : Schedule or cancel the recording of a programme or film
7 : Add a channel to favourites
There are several ways to change channels:
Navigate between channels using the “↑” or “↓” buttons on your remote control.
Swipe to the right on the navigation button to display the channel list over the current programme. Next to the channel logos, the programmes currently airing are displayed. You can then choose a new channel using the up/down edges of the navigation button and select the desired channel using the central button.
See “Vertical channel list”
All available channels and the programmes currently being broadcast are listed in a vertical list on the right-hand side of the screen. The programmes currently airing are displayed next to the channel logos.
To display the “Channel list” as an overlay, swipe the right arrow “→” on the directional pad of your remote control while watching TV. To close it, press the Back button on the remote control. Note: the player bar must be hidden for this to work.
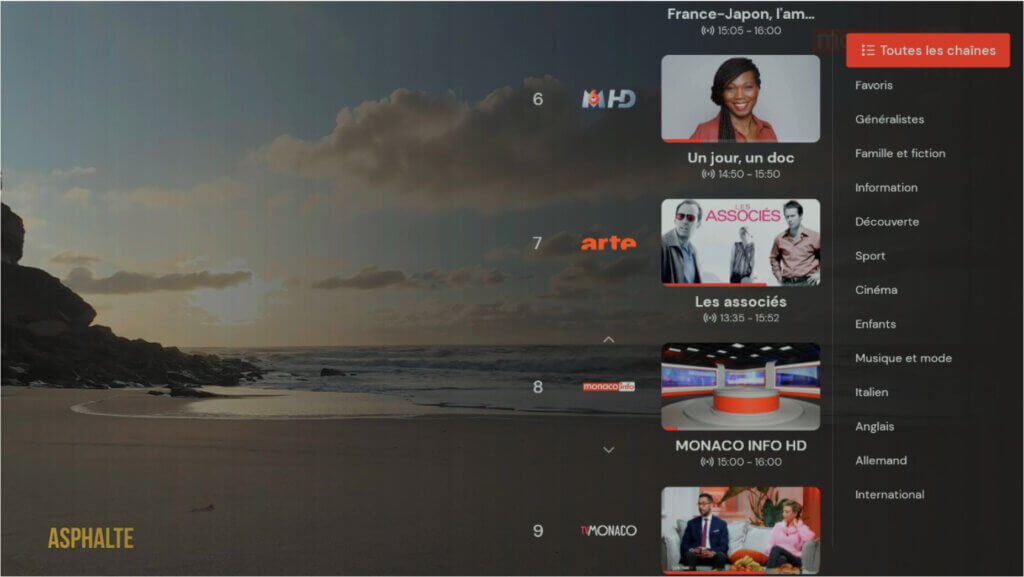
To confirm your selection and watch a programme currently airing on another channel, press the “OK” button on the directional pad of your remote control.
You can also limit the channel list to your favourite channels.
To do this, swipe to the right “→” when the vertical channel list is open. You can choose to display all channels, a channel category, or only your favourite channels.
See “Managing favourites”
It allows you to quickly browse channels, programmes currently airing on specific channels, as well as past and upcoming programmes. All of this without leaving the player, while continuing to watch your favourite show.
To display the “Mini programme guide” as an overlay, swipe the left arrow “←” on the directional pad of your remote control while watching TV. To close it, press the Back button on the remote control. Note: the player bar must be hidden for this to work.
Navigate through the “Mini EPG” using the buttons on the directional pad of the remote control:
- Up button “↑”,
- Down button “↓”,
- Left button “←”,
- Right button “→”.
To confirm your selection and watch a programme currently airing on another channel, or to view the details of an upcoming programme, press the “OK” button on the directional pad of your remote control.
When you press “Select” on the directional pad of the remote control while a programme is playing, the control bar appears at the bottom of the screen. From there, you can pause the live programme, record it, change the audio channel, or add subtitles if available.
The progress bar allows you to rewind. The white dots indicate the start of a programme and allow you to jump back to specific moments in the content.
Note: the availability of live TV control depends on channel rights and may not be available for all channels.
When you switch to another live channel, you return to live TV.
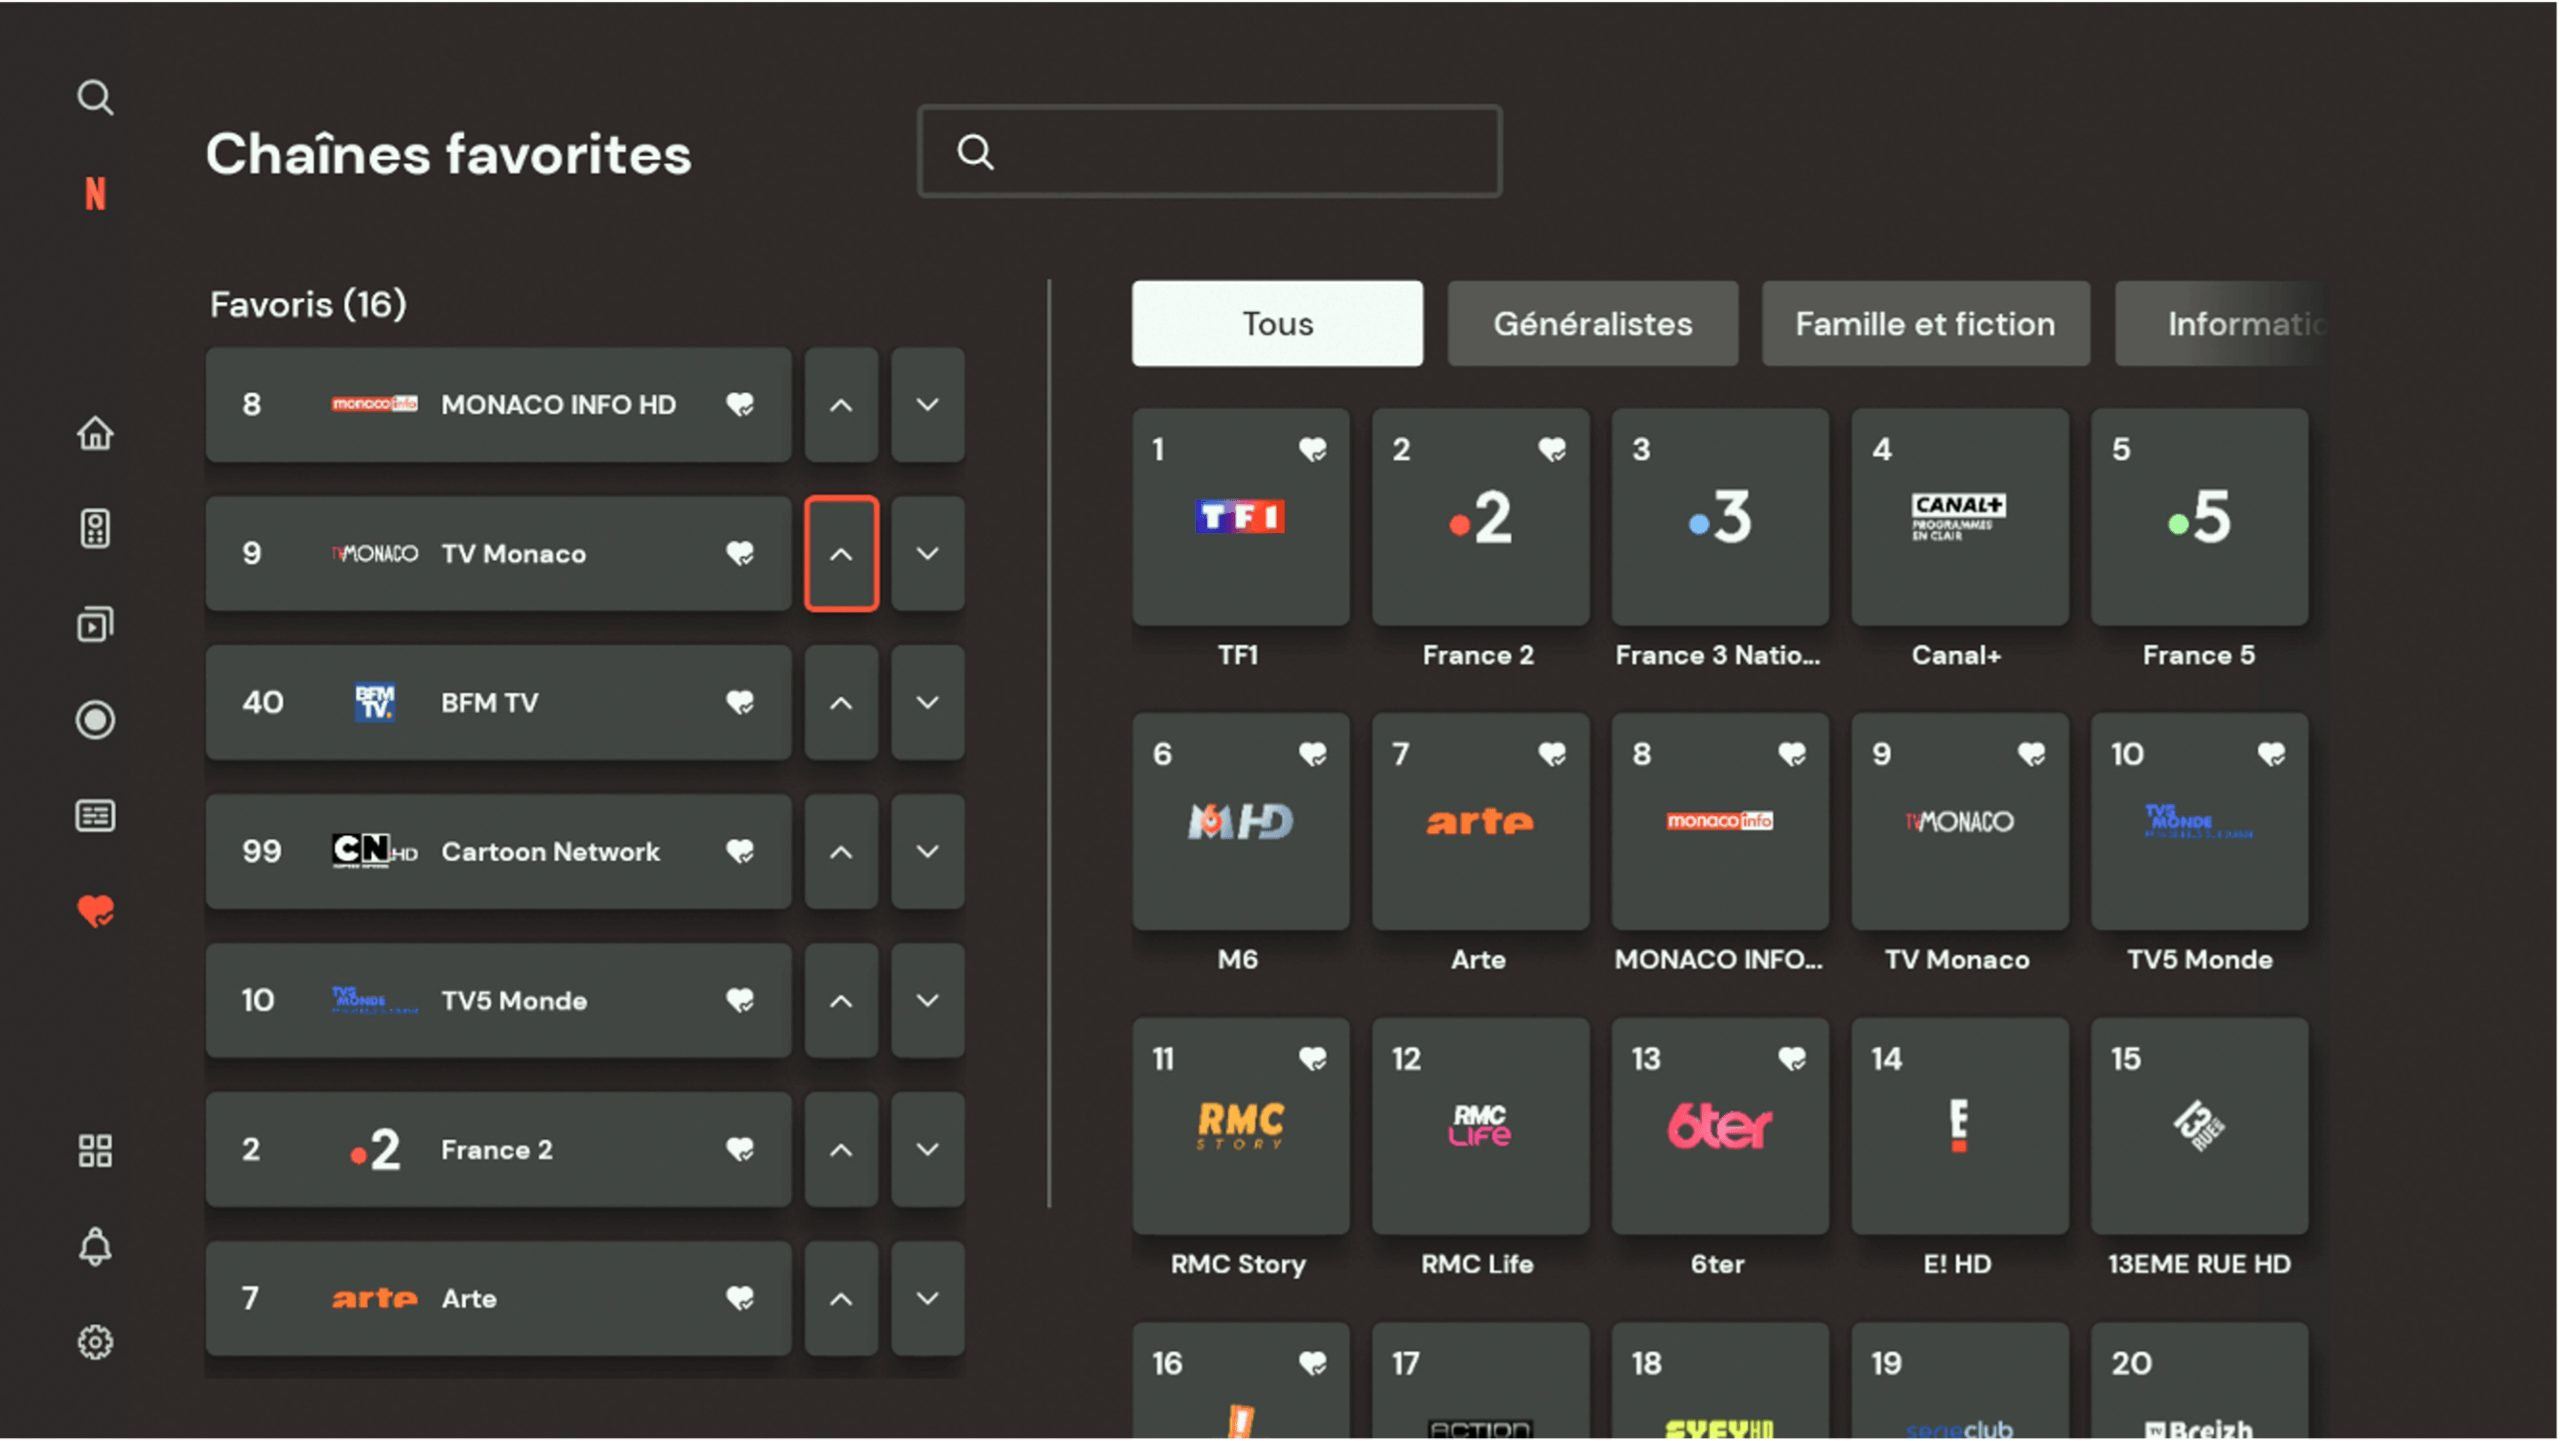
To quickly find your favourite channels, you can create a favourites list. This allows you to access the content you are interested in quickly and easily.
You decide which channels are listed and in what order.
1. Expand the menu located on the right-hand side of the screen and go to the “Favourites” tab.
2. Select the “Favourite channels” button, which will take you to the corresponding subpage, then choose “Manage favourites”.
3. Select the channel you want to add to your favourites and press the OK button. A heart will appear in the top-right corner of the tile, indicating that the channel has been successfully added to your favourites.
4. The channel you added to your favourites will appear in the list on the left-hand side of the screen.
5. To change the order of your favourite channels, select the arrow next to your favourite channel and press OK.
Note: it is also possible to add a channel to your favourites while a programme is playing (see “Watching television”).
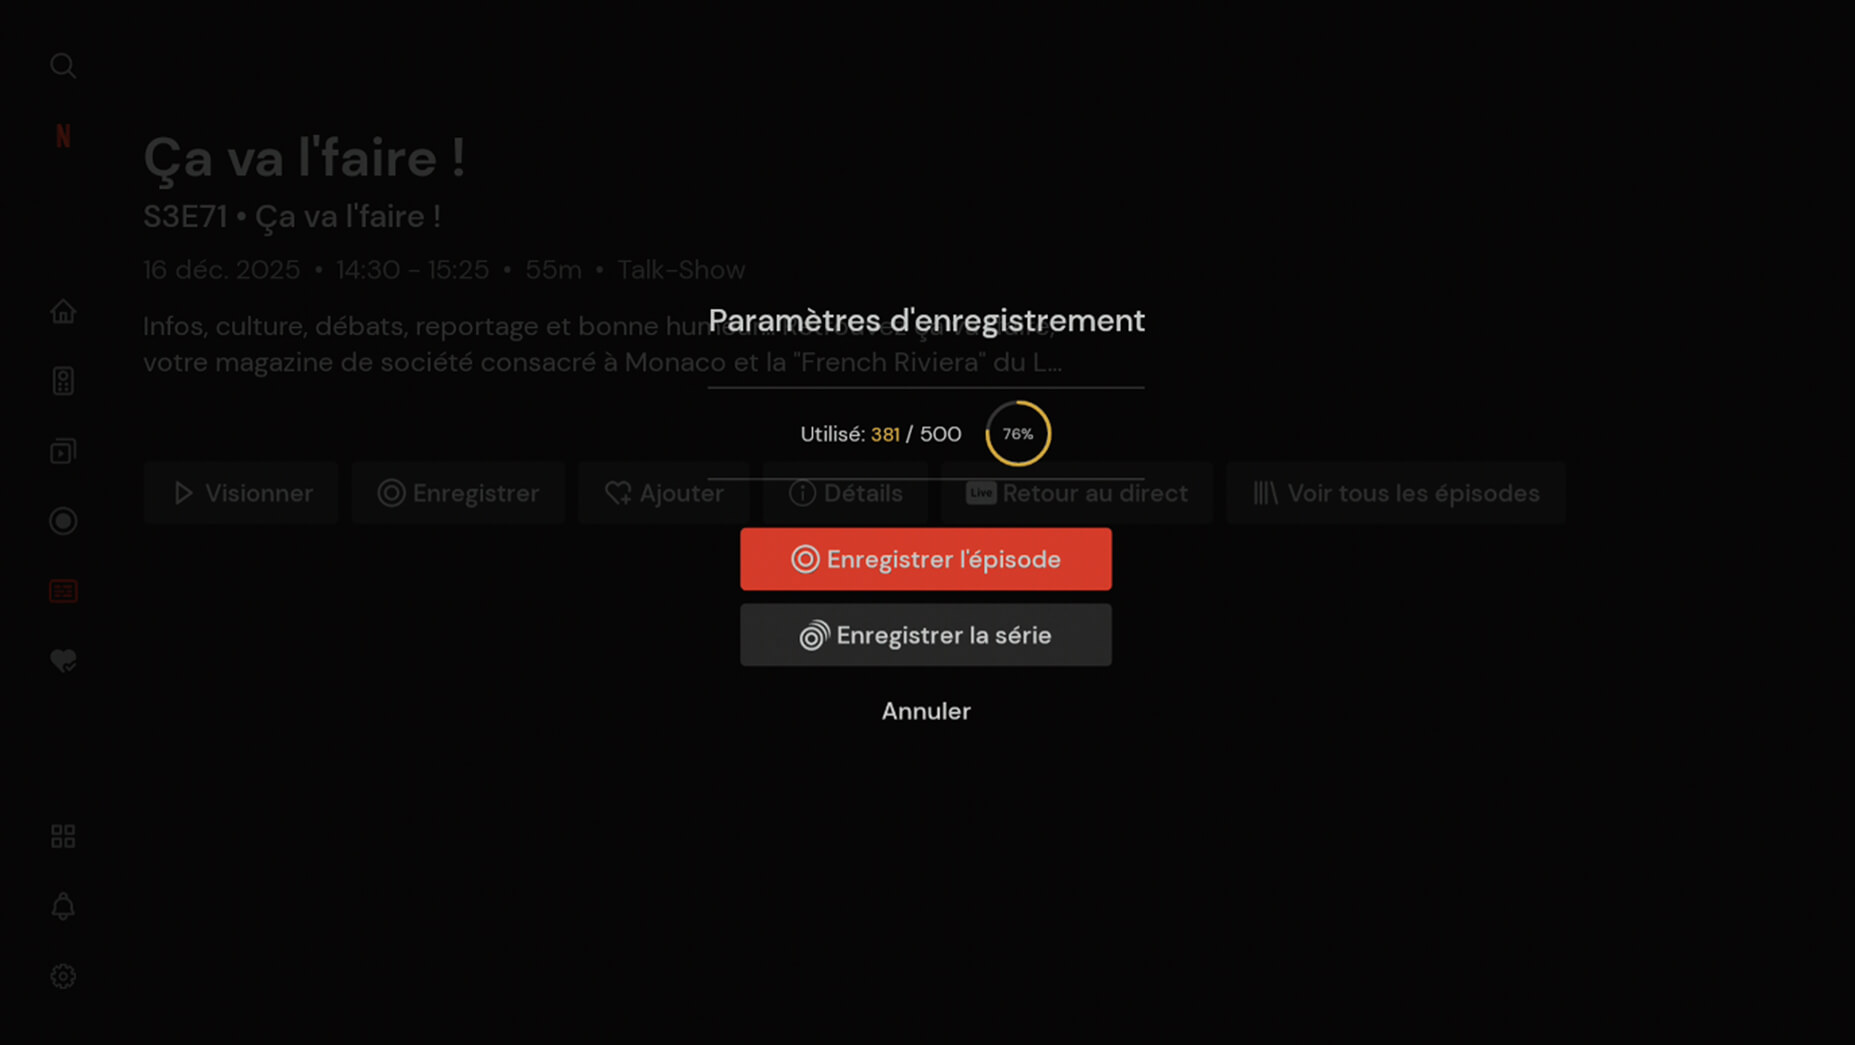
To record a programme/film from the programme details page, press the Record button ![]()

An overlay screen will appear with the available options and information about the recording space used. You can choose to record a single episode (“Record episode”) or a series of episodes associated with a given series (“Record series”).
Manage recording:
Once you have recorded an episode or an entire series, click the “Recording settings” button ![]() to delete a recorded episode or manage the episodes associated with a given series.
to delete a recorded episode or manage the episodes associated with a given series.
Recording – Icons and meanings
Recording:
![]() Schedule a recording / Record an episode
Schedule a recording / Record an episode
![]() Record the series
Record the series
![]() Episode/Series recorded
Episode/Series recorded
Delete a recording:
Once you have recorded an episode or an entire series, click the:
“Recording settings” ![]() to delete a recorded episode or cancel the recording of episodes associated with a given series.
to delete a recorded episode or cancel the recording of episodes associated with a given series.
Recording – Icons and meanings:
Stop recording:
![]() Recording settings
Recording settings
![]() Delete episode
Delete episode
![]() Cancel series recording
Cancel series recording
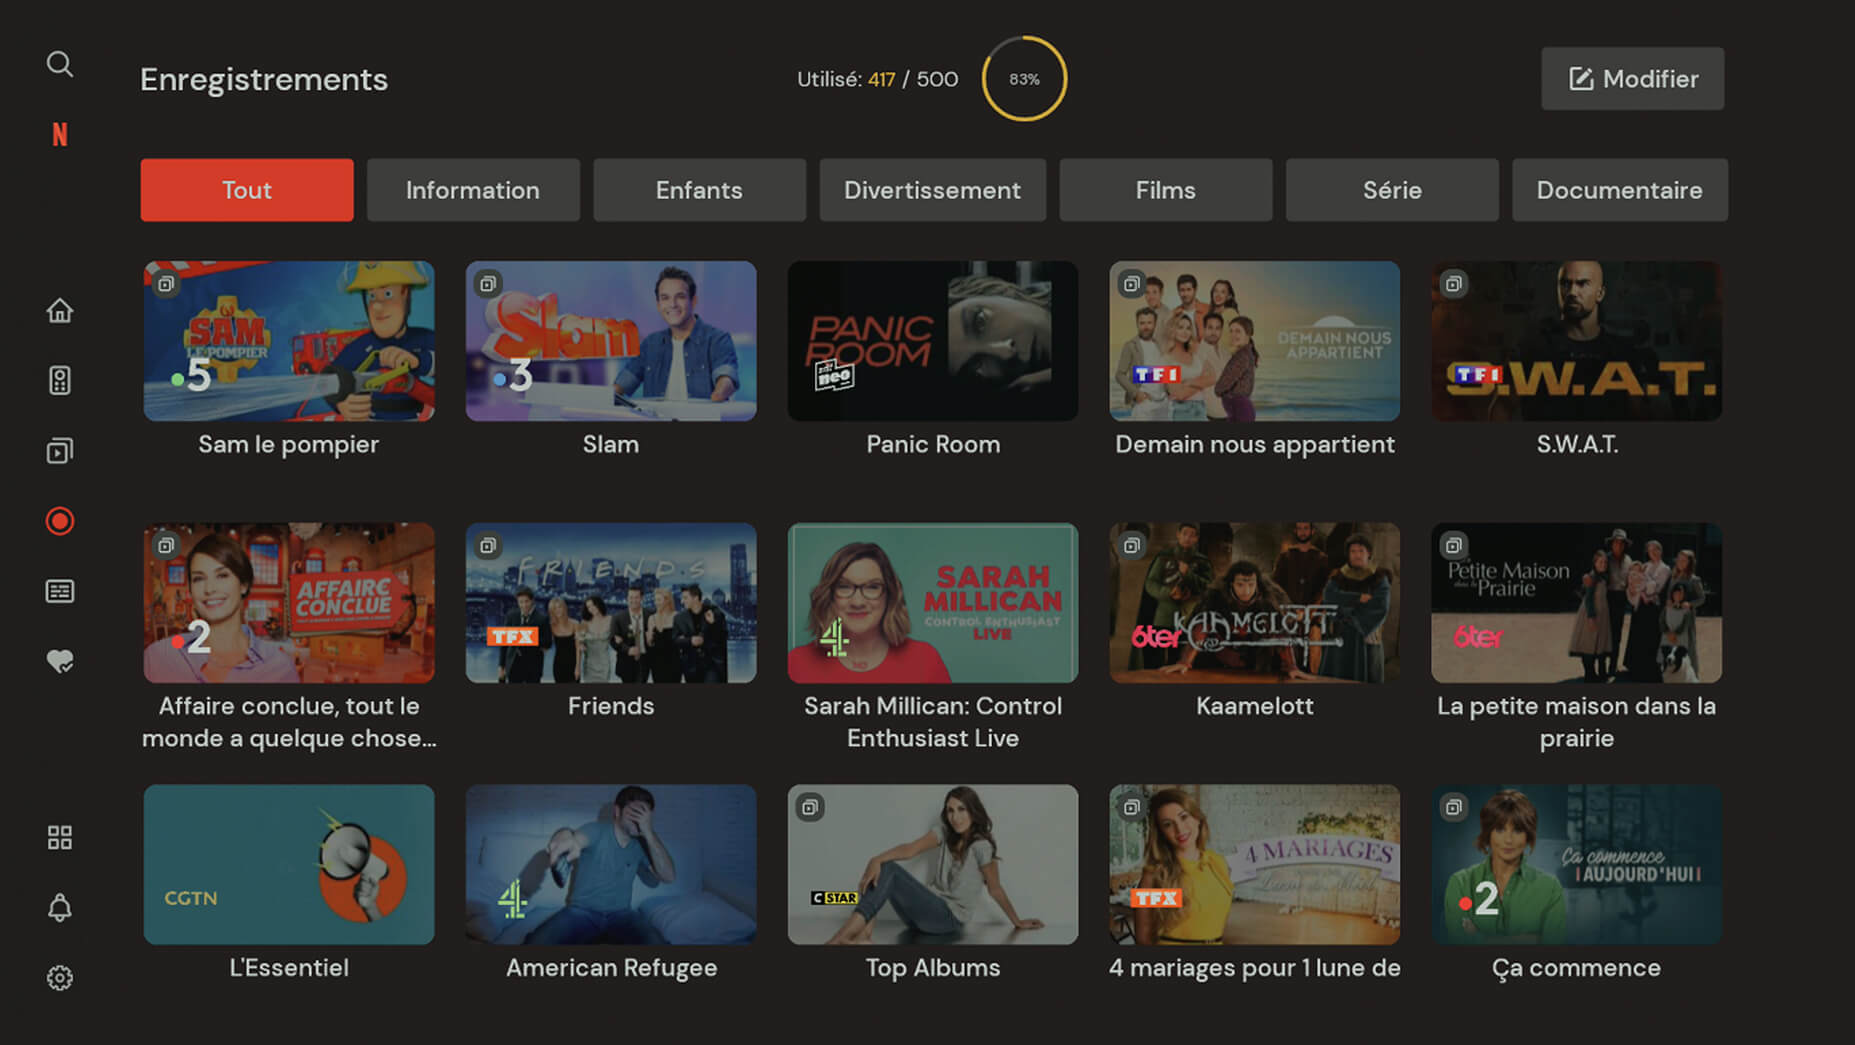
All available and scheduled recordings are displayed on the “Recordings” subpage. You can select a category to quickly filter available recordings by genre, type, or category.
You can also check your available recording space using a graphical indicator (a circle with a counter) that shows how much of the available space is being used.
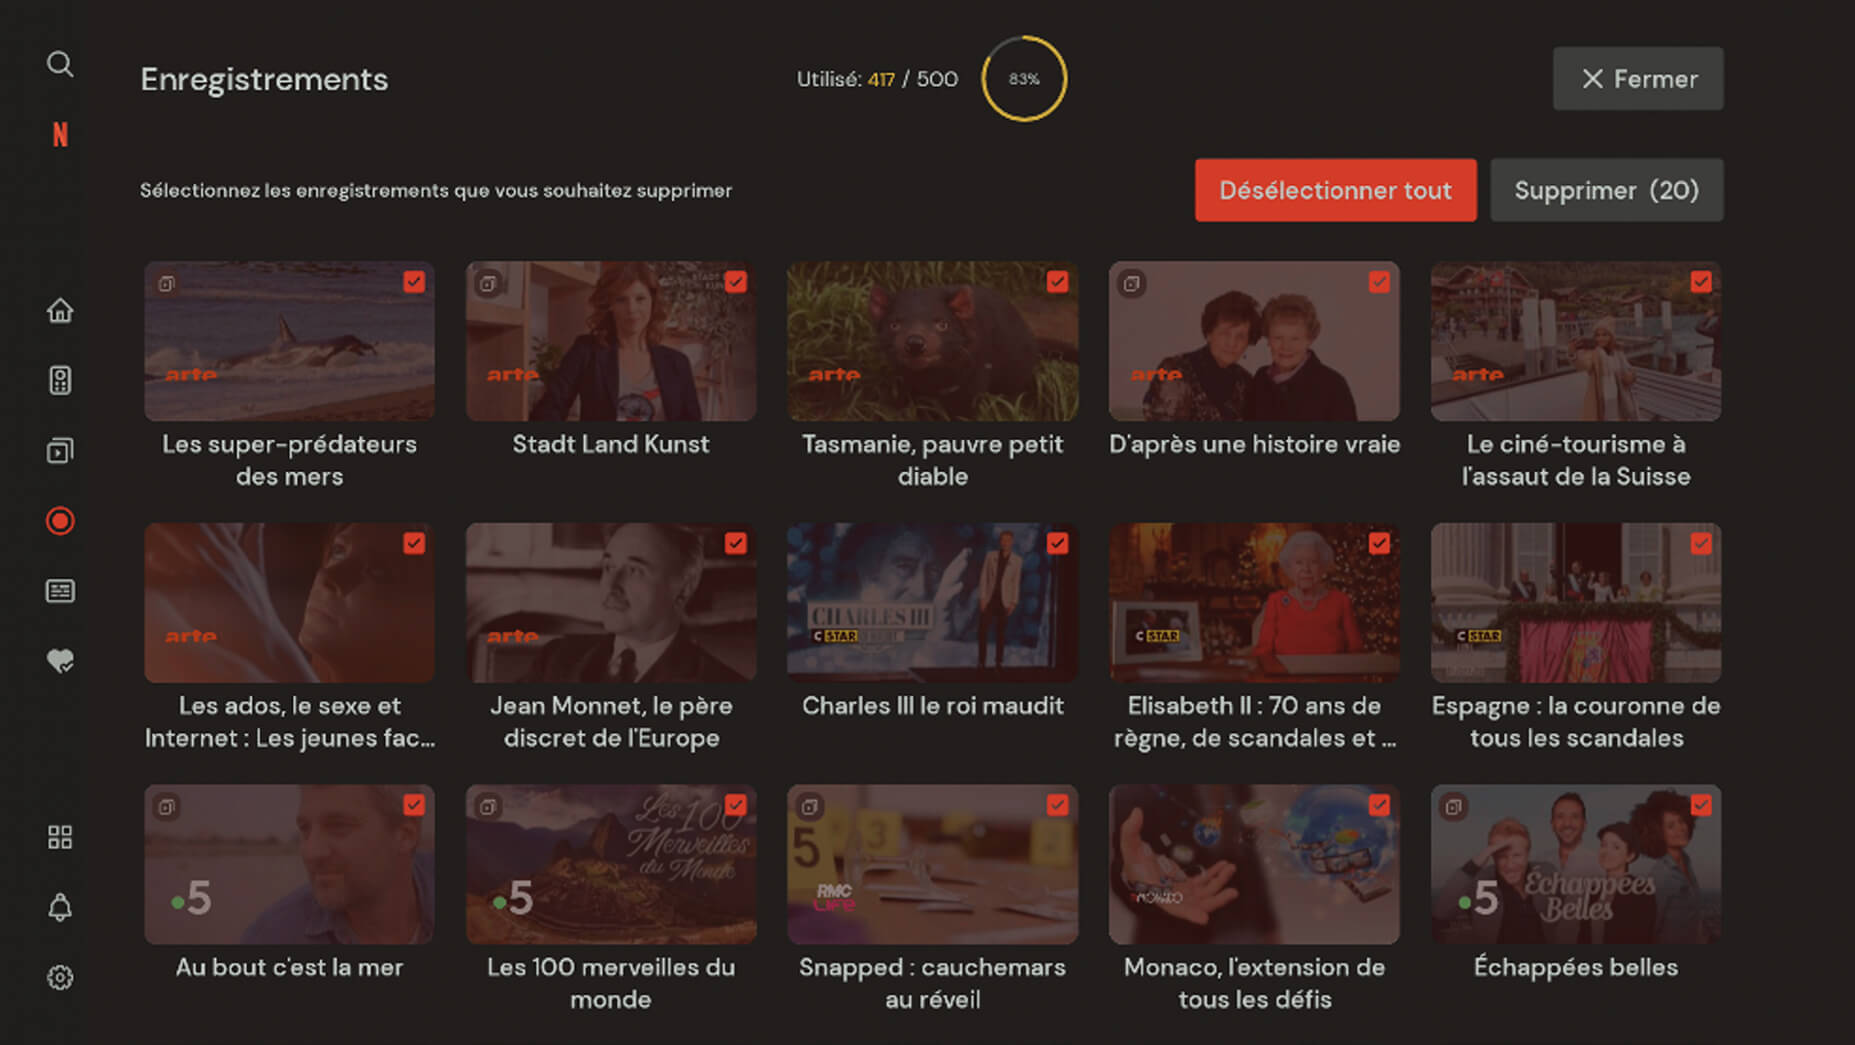
Click the “Edit” button to select all recordings or individual recordings to delete.
Recording capacity in number of recordings: The circular graphical display indicates how much of the available capacity is used.
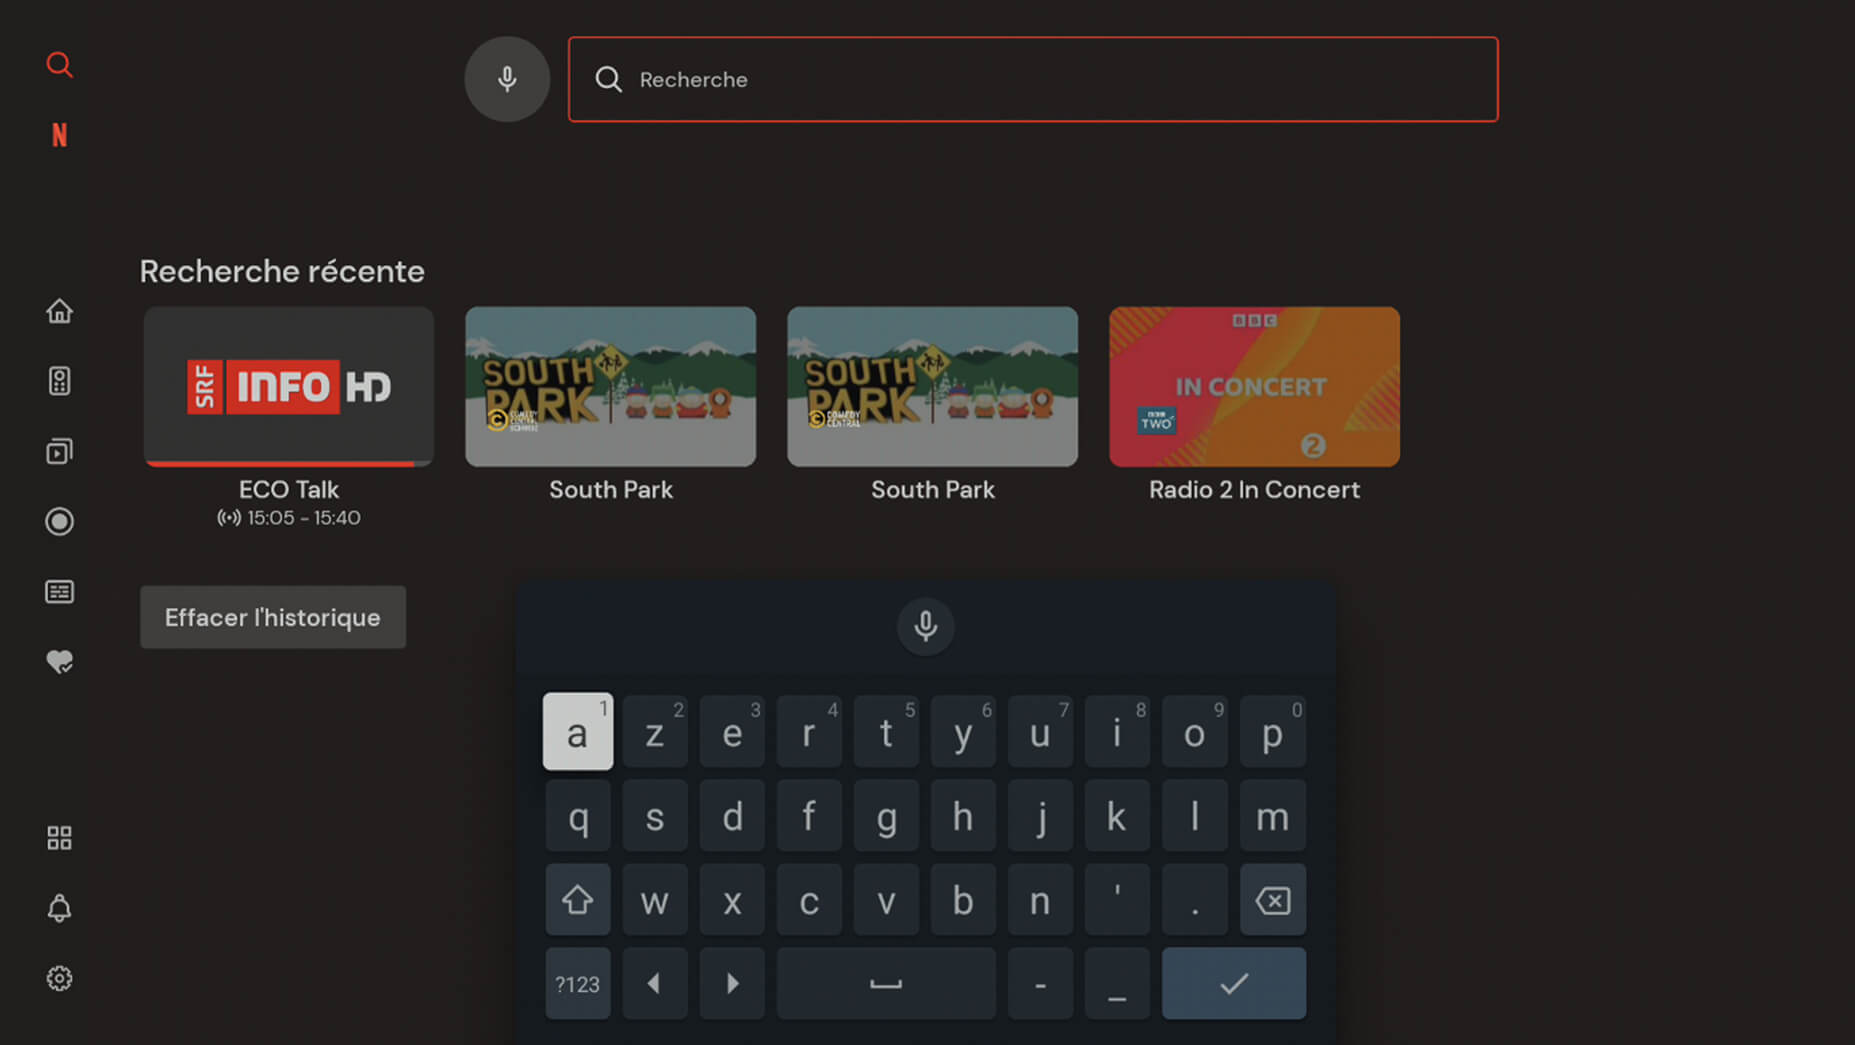
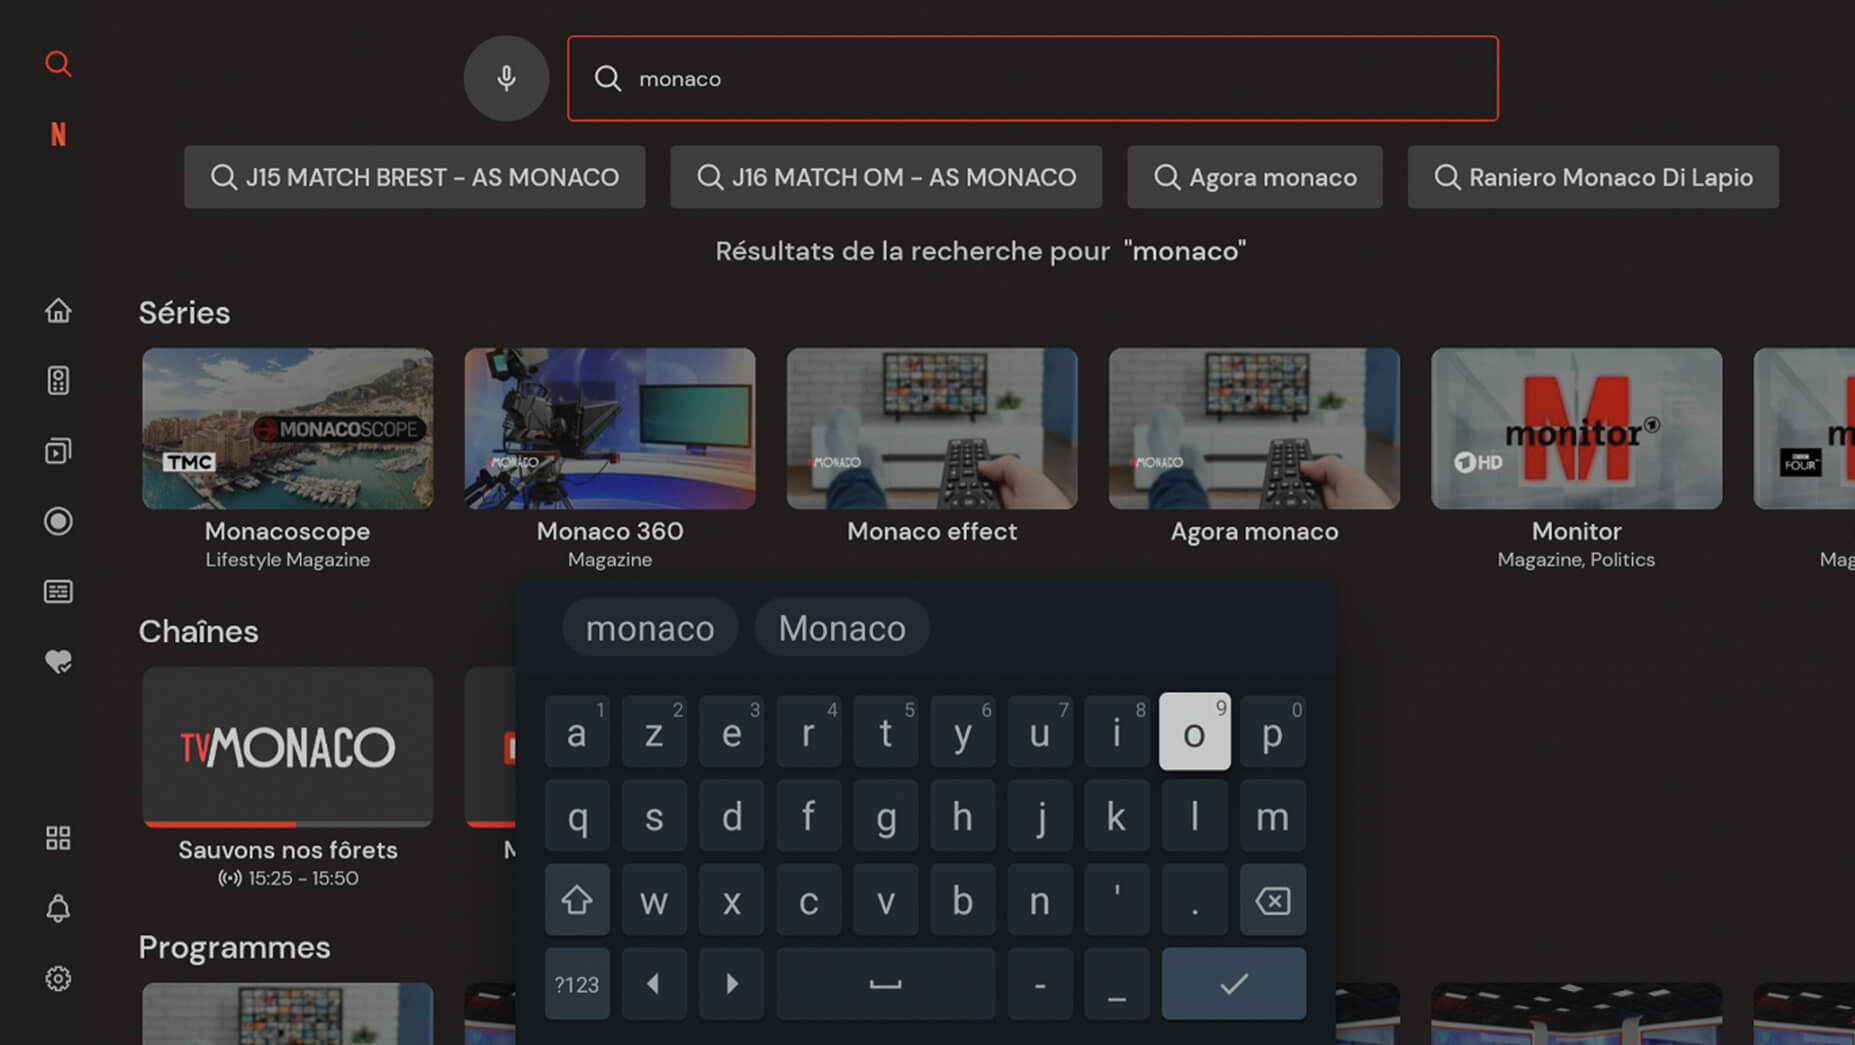
Thanks to the search function in the main menu, you can find programmes that have already been broadcast and are available for replay, as well as live, upcoming, and recorded content.
To perform a search using the keyboard, select “Keyboard input” and press the “OK” button on your remote control. Enter your query using the on-screen keyboard.
To perform a search using voice control, select the “Microphone” option and press the “Select” button. You can then speak your search query into the microphone.
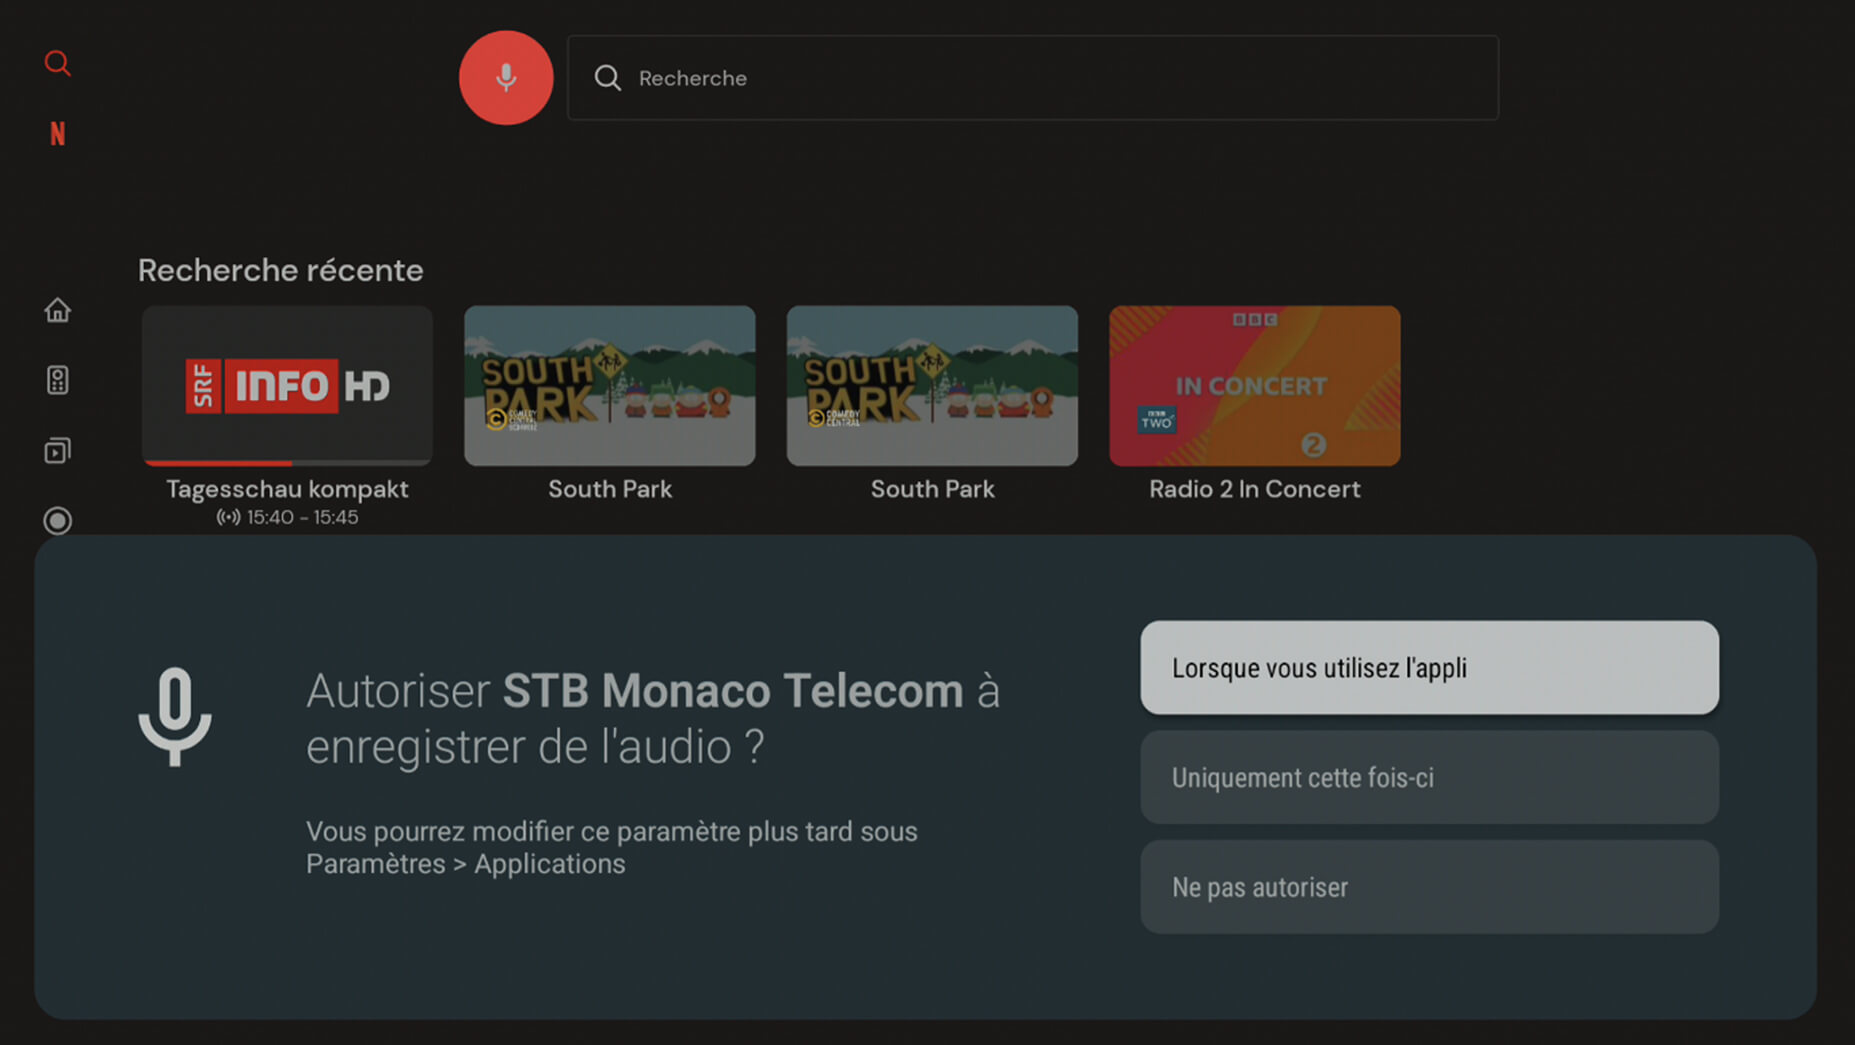
Note: when using the voice feature for the first time, you must authorise audio recordings for this purpose.
All your live TV channels as well as your recordings are accessible on your smartphone via the MonacoTelecomTV app.
All your live TV channels as well as your recordings are accessible on your computer via this link.
Simply go to your myMT customer area.
From the home page of your myMT customer area, go to the TV section by clicking on “More info”.
Click on “Edit” in the “Login password” section to reset your password.
- Connectez la TV Box au téléviseur à l'aide du câble HDMI fourni.
- Connectez l'adaptateur secteur à la TV Box et branchez-la dans une prise de courant.
- Assurez-vous que le téléviseur est allumé.
- Sélectionnez l'entrée TV à laquelle la TV Box est connectée.
- Une fois la connexion établie avec succès, l'assistant de bienvenue apparaîtra sur l'écran de télévision.
Une fois que vous avez connecté votre TV Box à votre téléviseur et à votre source d'alimentation (voir « Première installation de la TV Box » > « Connexion au téléviseur »), votre TV Box lancera le processus de configuration.
Après le premier démarrage, appuyer sur n’importe quel bouton de la télécommande déclenchera la connexion automatique entre votre télécommande et la TV Box.
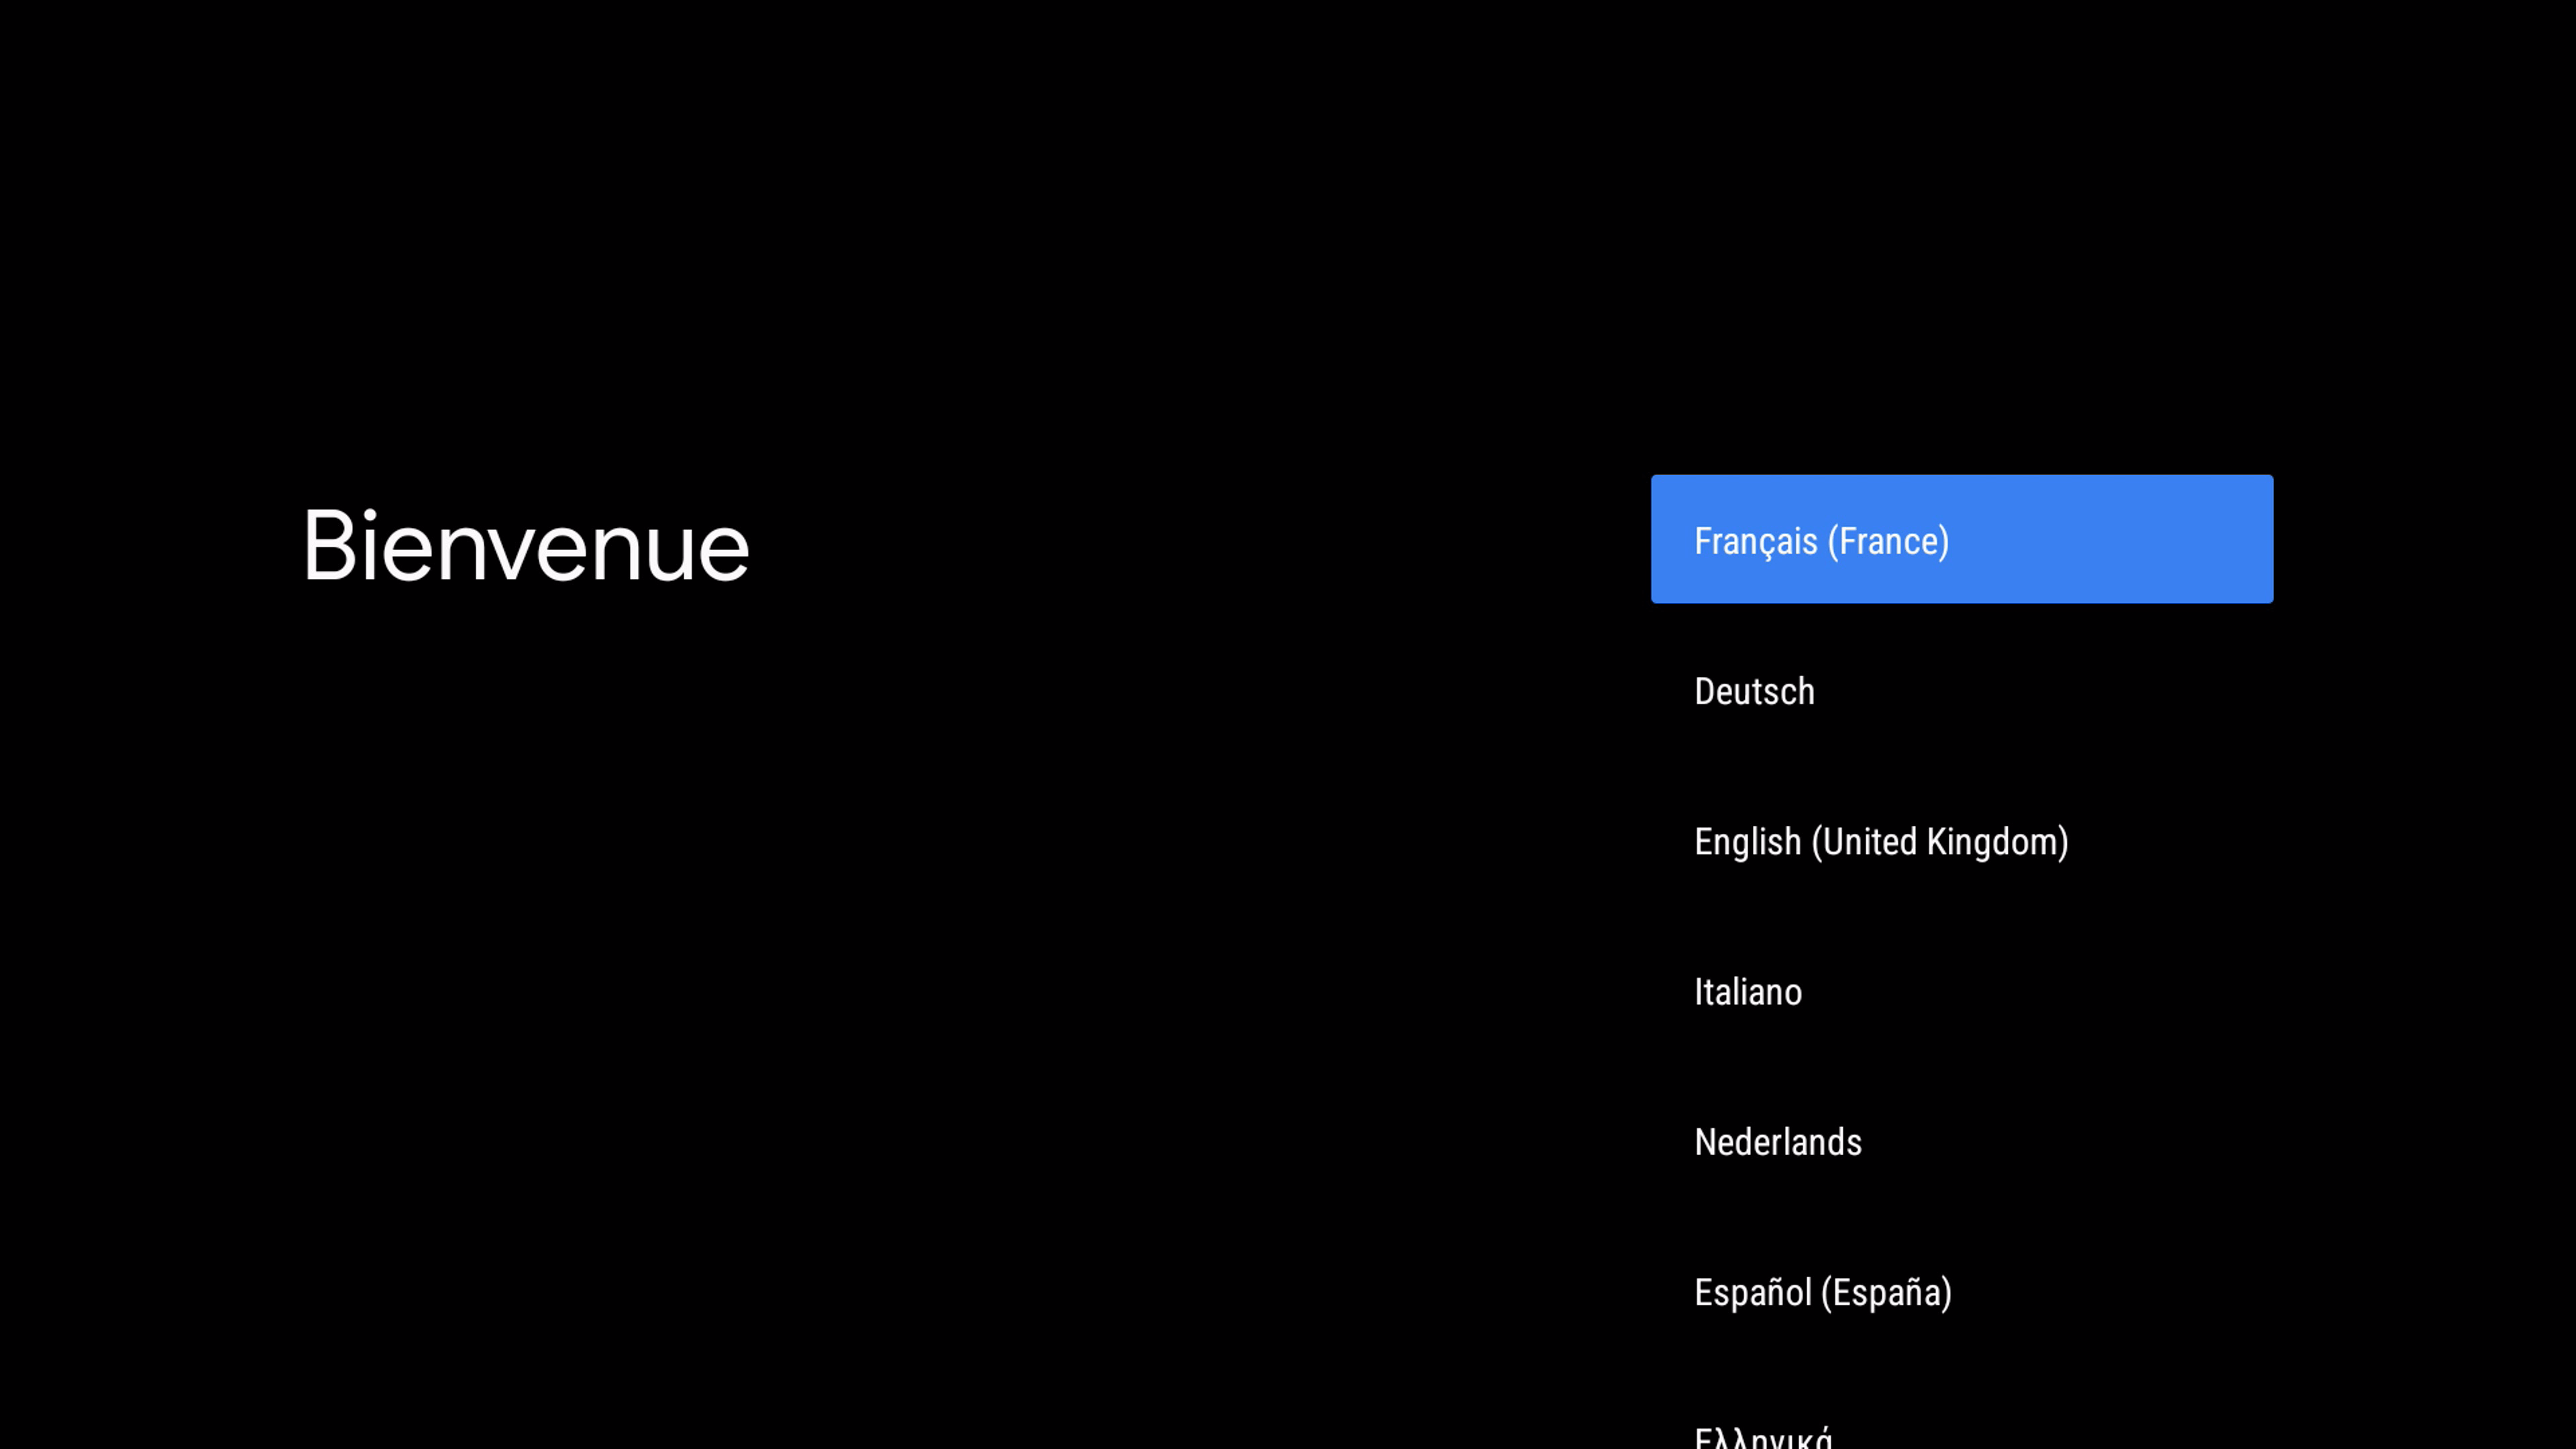
Vous pourrez alors choisir votre langue préférée. L'application TV prend en charge les langues suivantes :
- Anglais
- Français
- italien
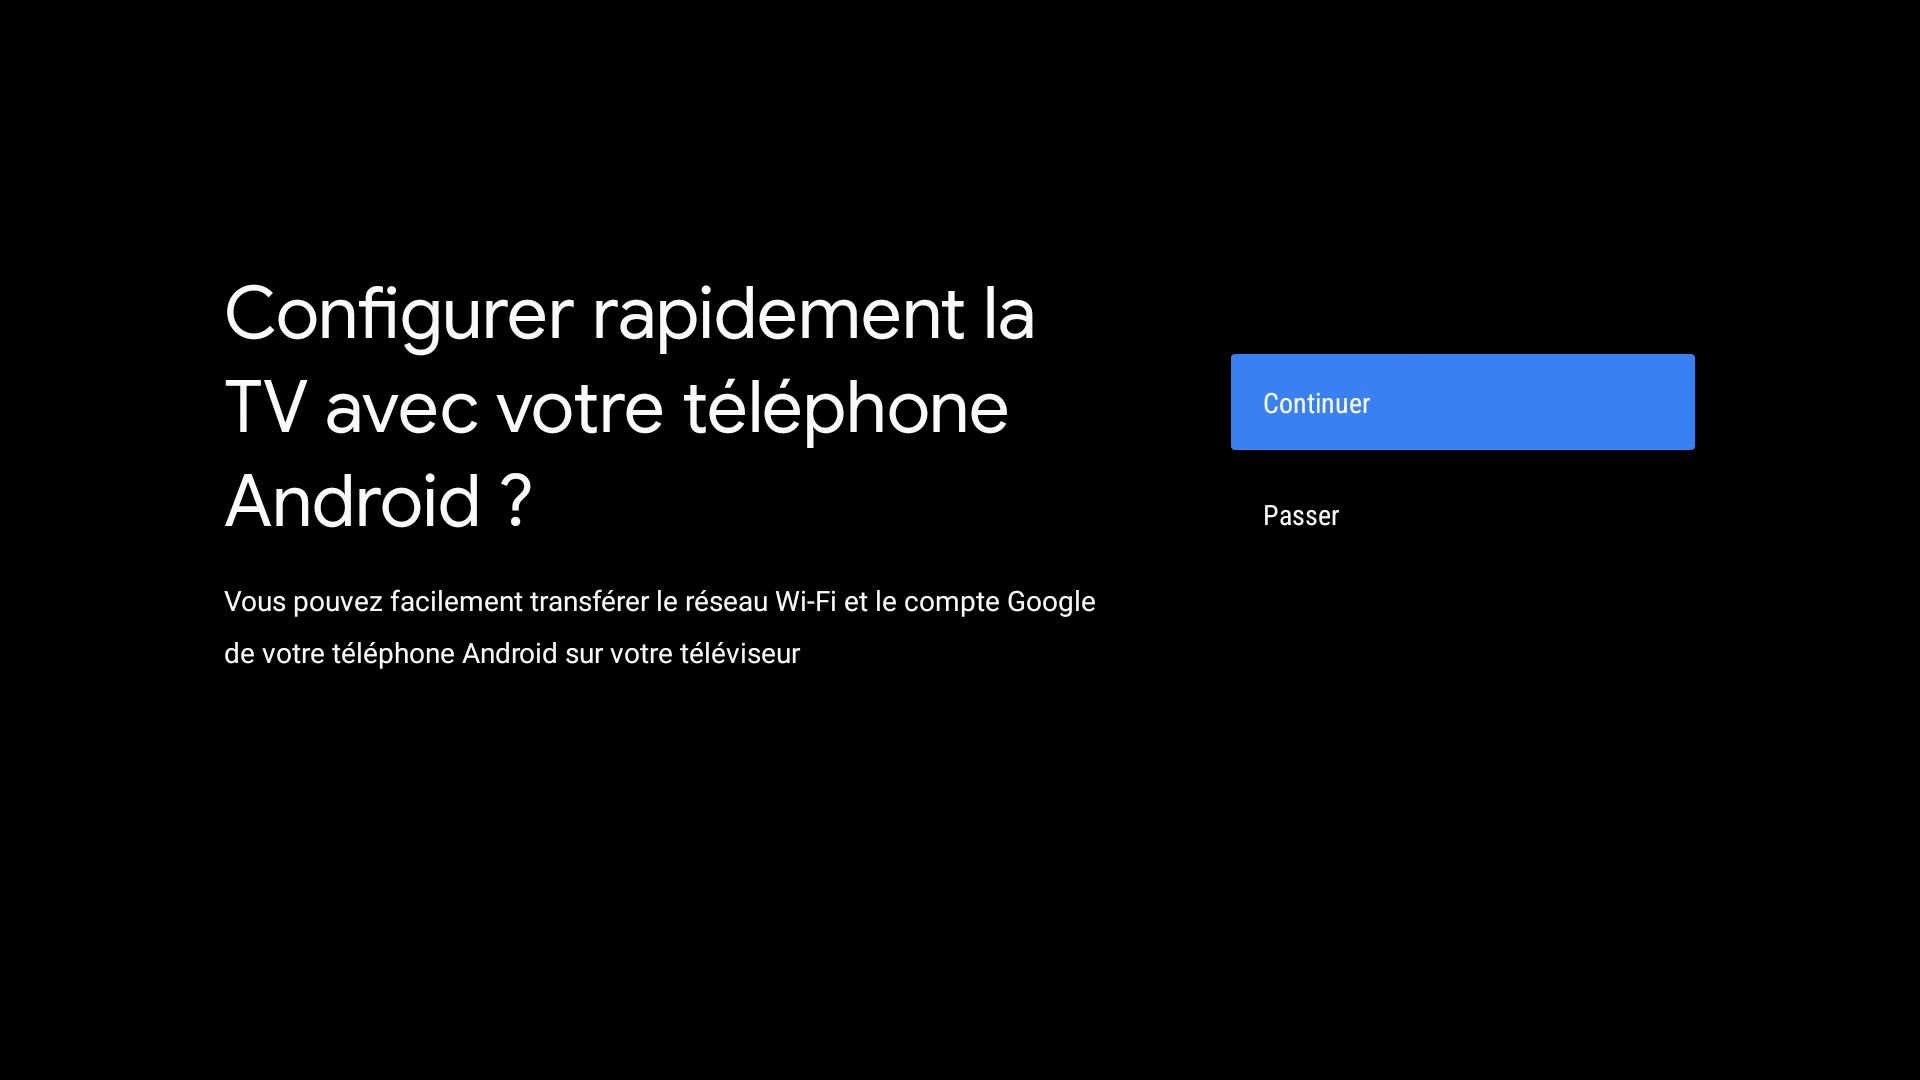
Si vous possédez un smartphone, vous pouvez l'utiliser pour transférer rapidement et facilement les mots de passe Wi-Fi et votre compte Google vers la TV Box.
Pour ce faire, assurez vous que le Wi-Fi et le Bluetooth sont activés sur votre smartphone.
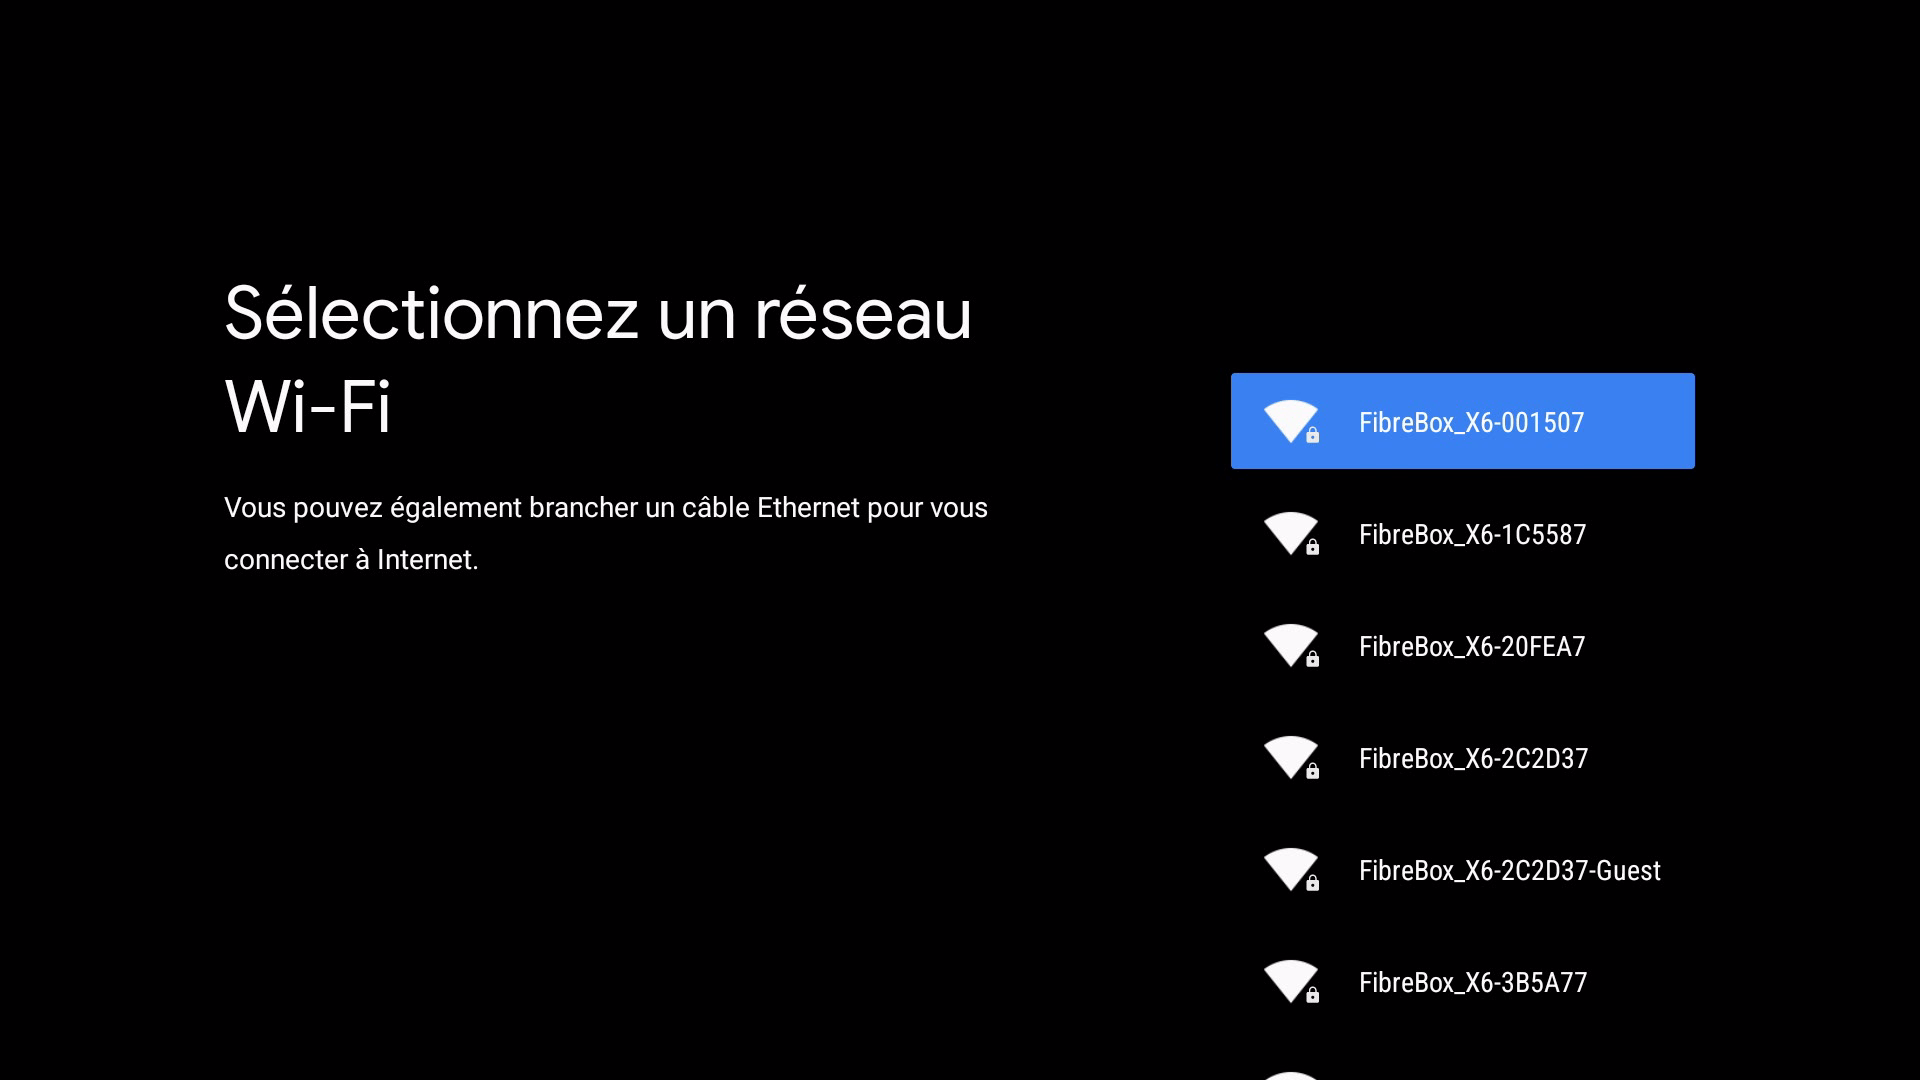
Pour une expérience TV optimale et ininterrompue, nous vous recommandons de connecter votre TV Box à Internet à l'aide d'un câble Ethernet.
Si vous préférez configurer manuellement votre TV Box pour le Wi-Fi, vous serez invité à vous connecter à un réseau domestique. Sélectionnez le réseau Wi-Fi souhaité dans la liste et suivez les instructions à l'écran pour établir la connexion.
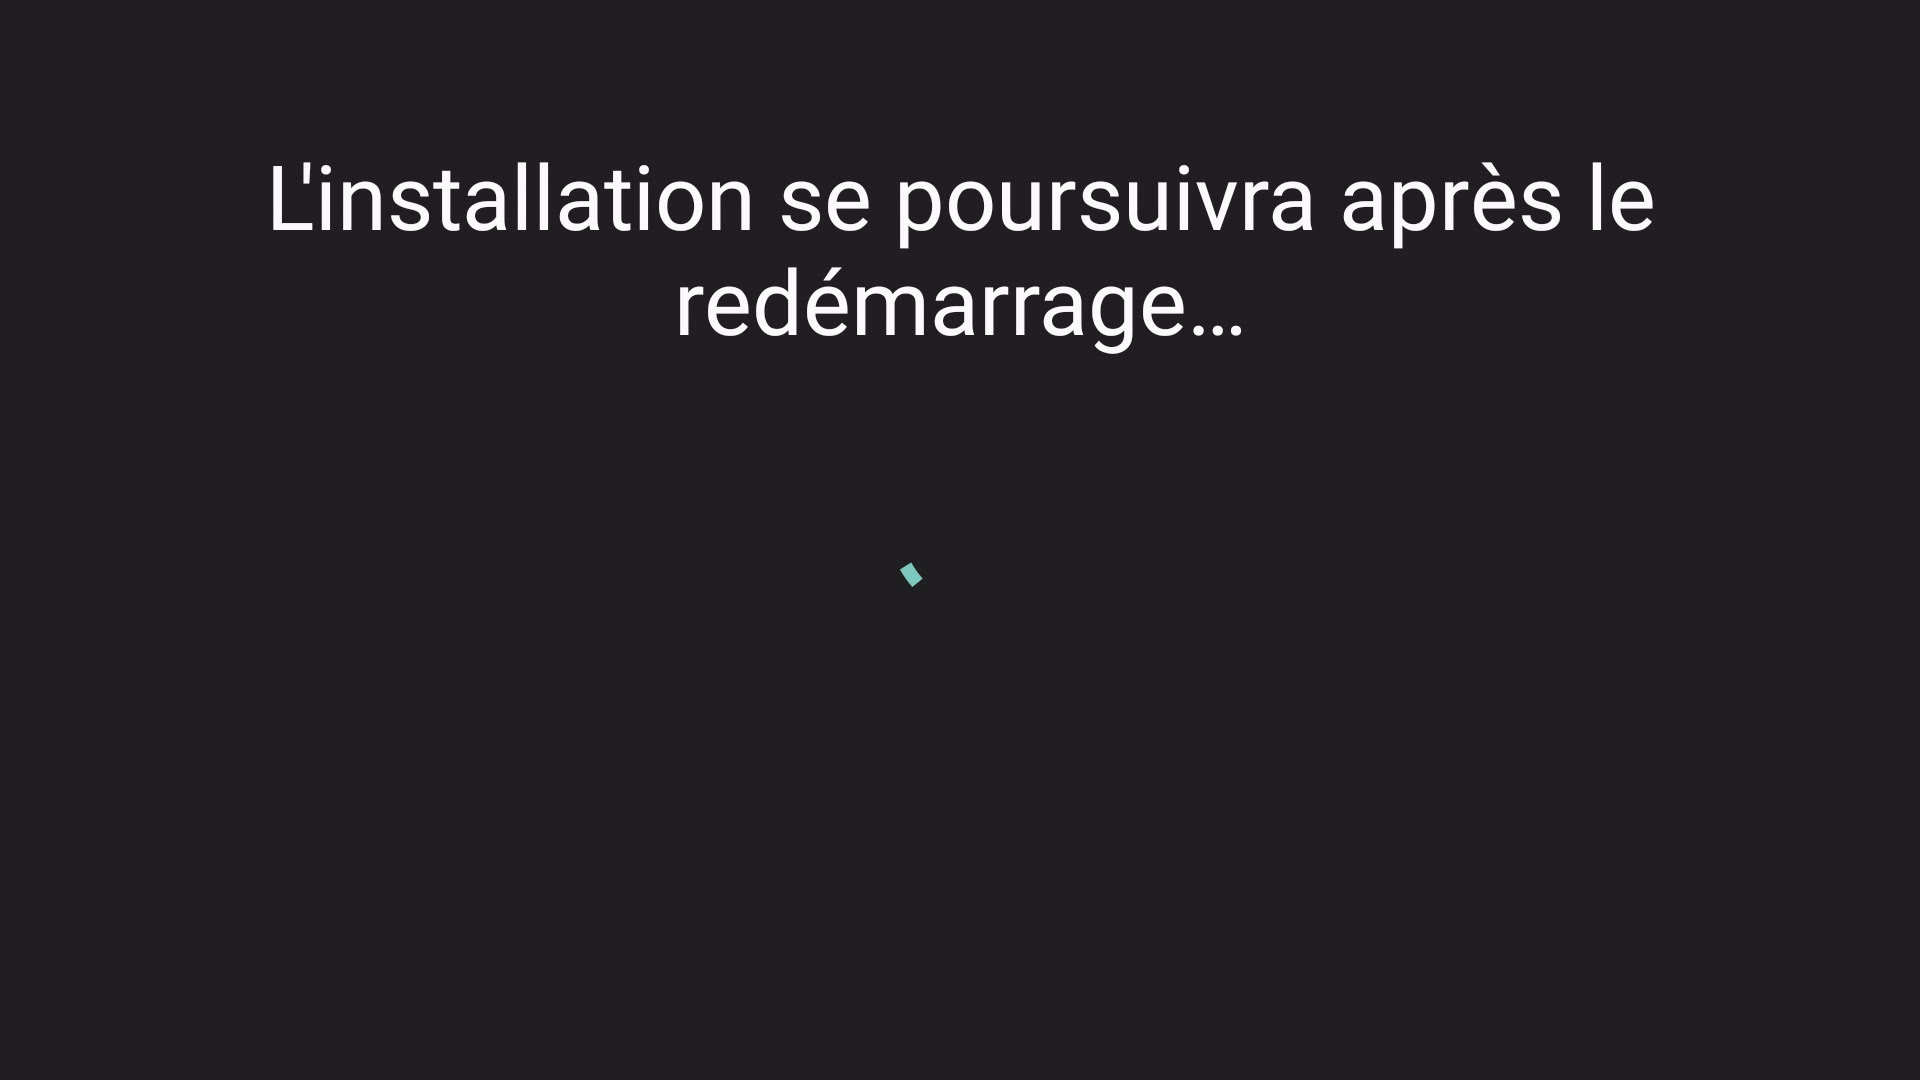
Une fois la connexion réseau établie avec succès, certains paramètres de base seront transférés sur votre TV Box. Cette dernière redémarrera automatiquement à la fin de cette étape. Ce processus peut prendre quelques instants. Veuillez ne pas éteindre la TV Box pendant ce processus.
Après le redémarrage, il vous sera demandé une nouvelle fois de confirmer vos paramètres de langue et de réseau.
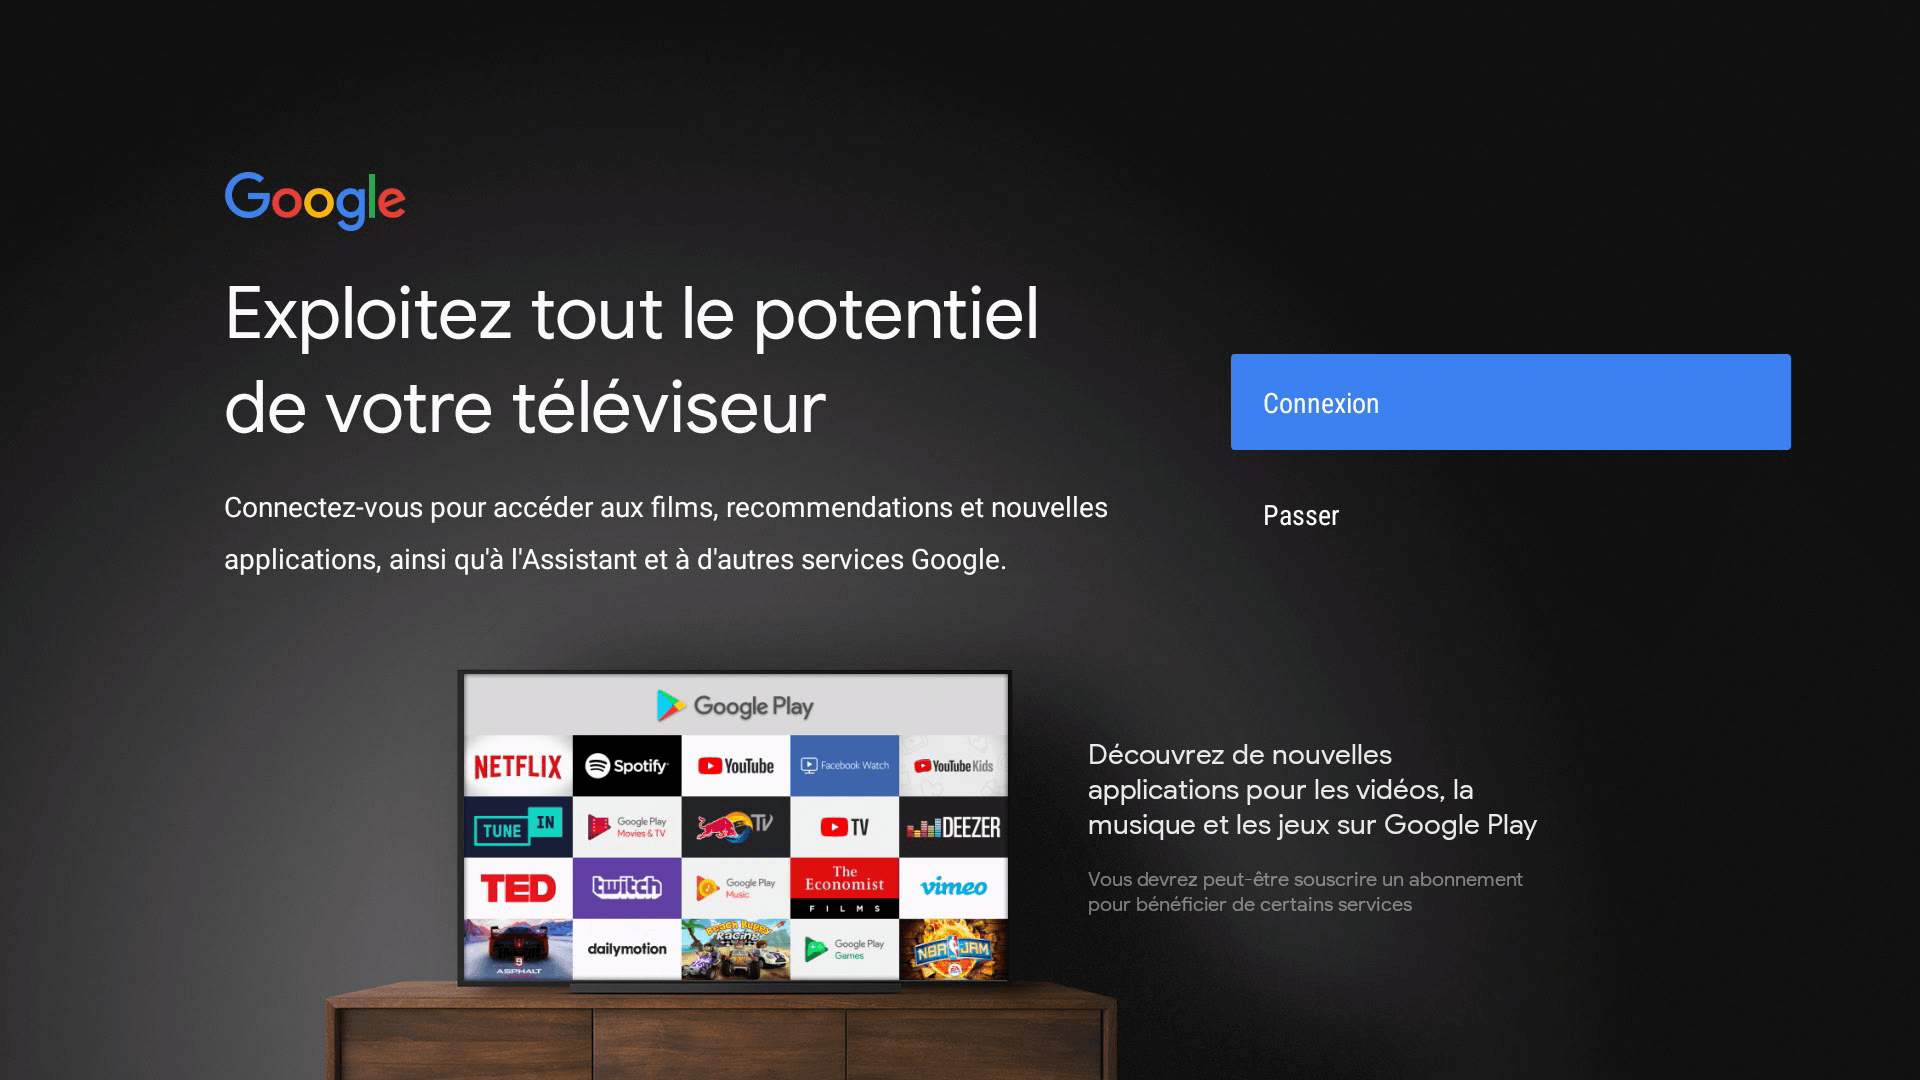
Suivez les instructions à l'écran pour créer un compte Google sur votre TV Box si vous le souhaitez.
Un compte Google n'est pas requis pour utiliser la TV Box.
Vous pouvez également ajouter un compte Google à l'appareil ultérieurement à tout moment dans les paramètres système.
Remarque : que vous décidiez ou non d'ajouter un compte Google, les conditions d'utilisation et la politique de confidentialité de Google s'afficheront. Veuillez les accepter pour terminer la configuration.
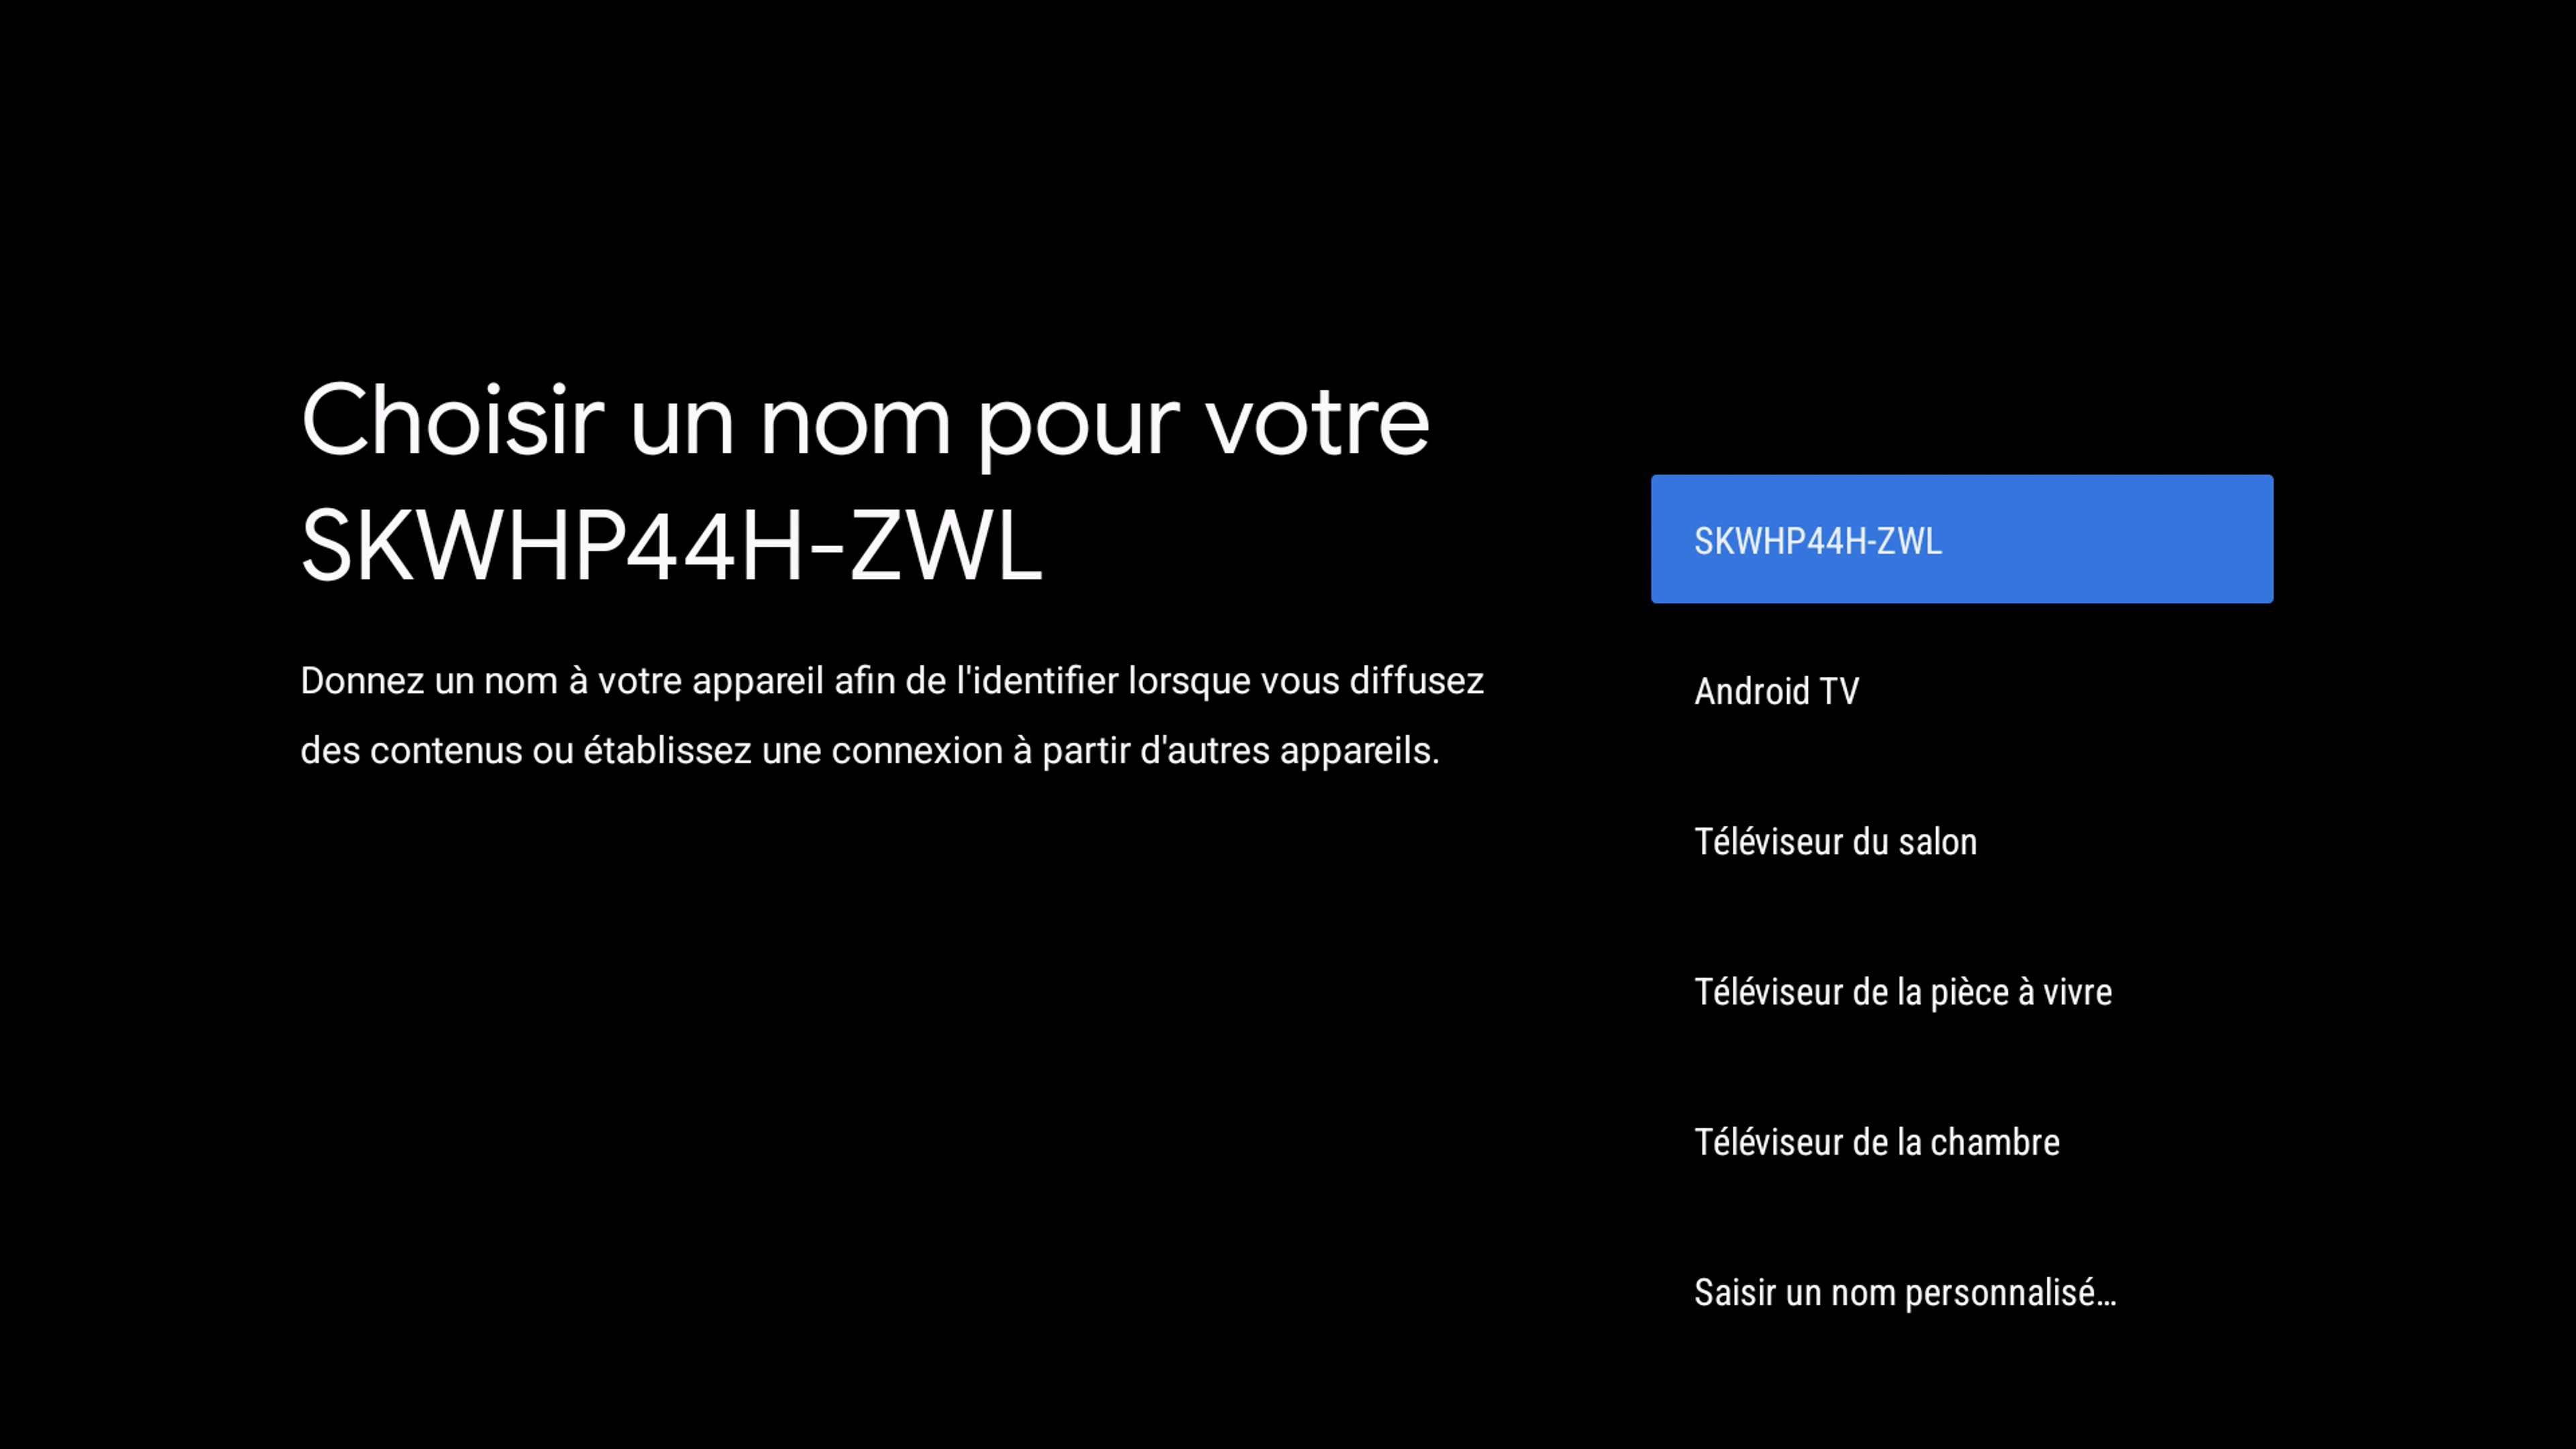
Vous pouvez maintenant attribuer un nom à votre TV Box. Cela peut vous aider à localiser l'appareil sur votre réseau ultérieurement.
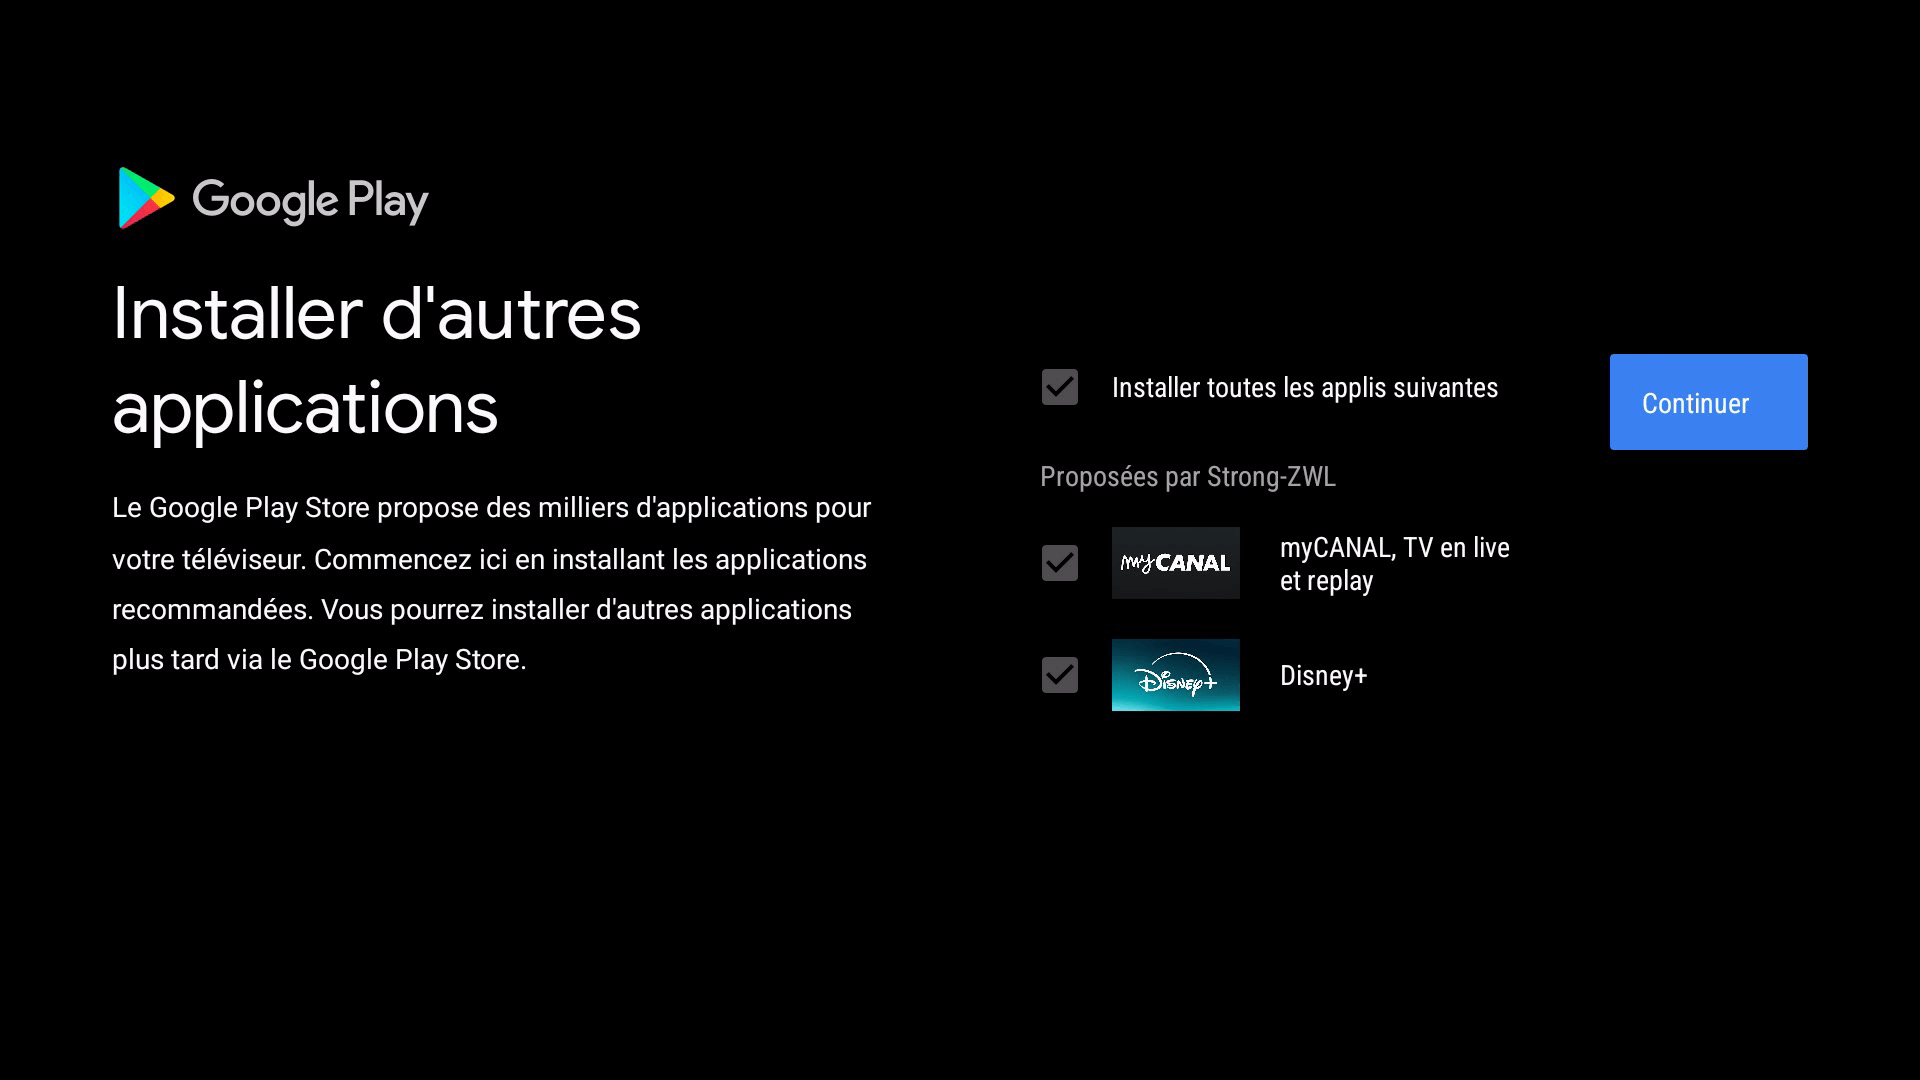
À l'étape suivante, vous pourrez décider si vous souhaitez installer toutes les applications suggérées, seulement quelques-unes d'entre elles ou aucune.
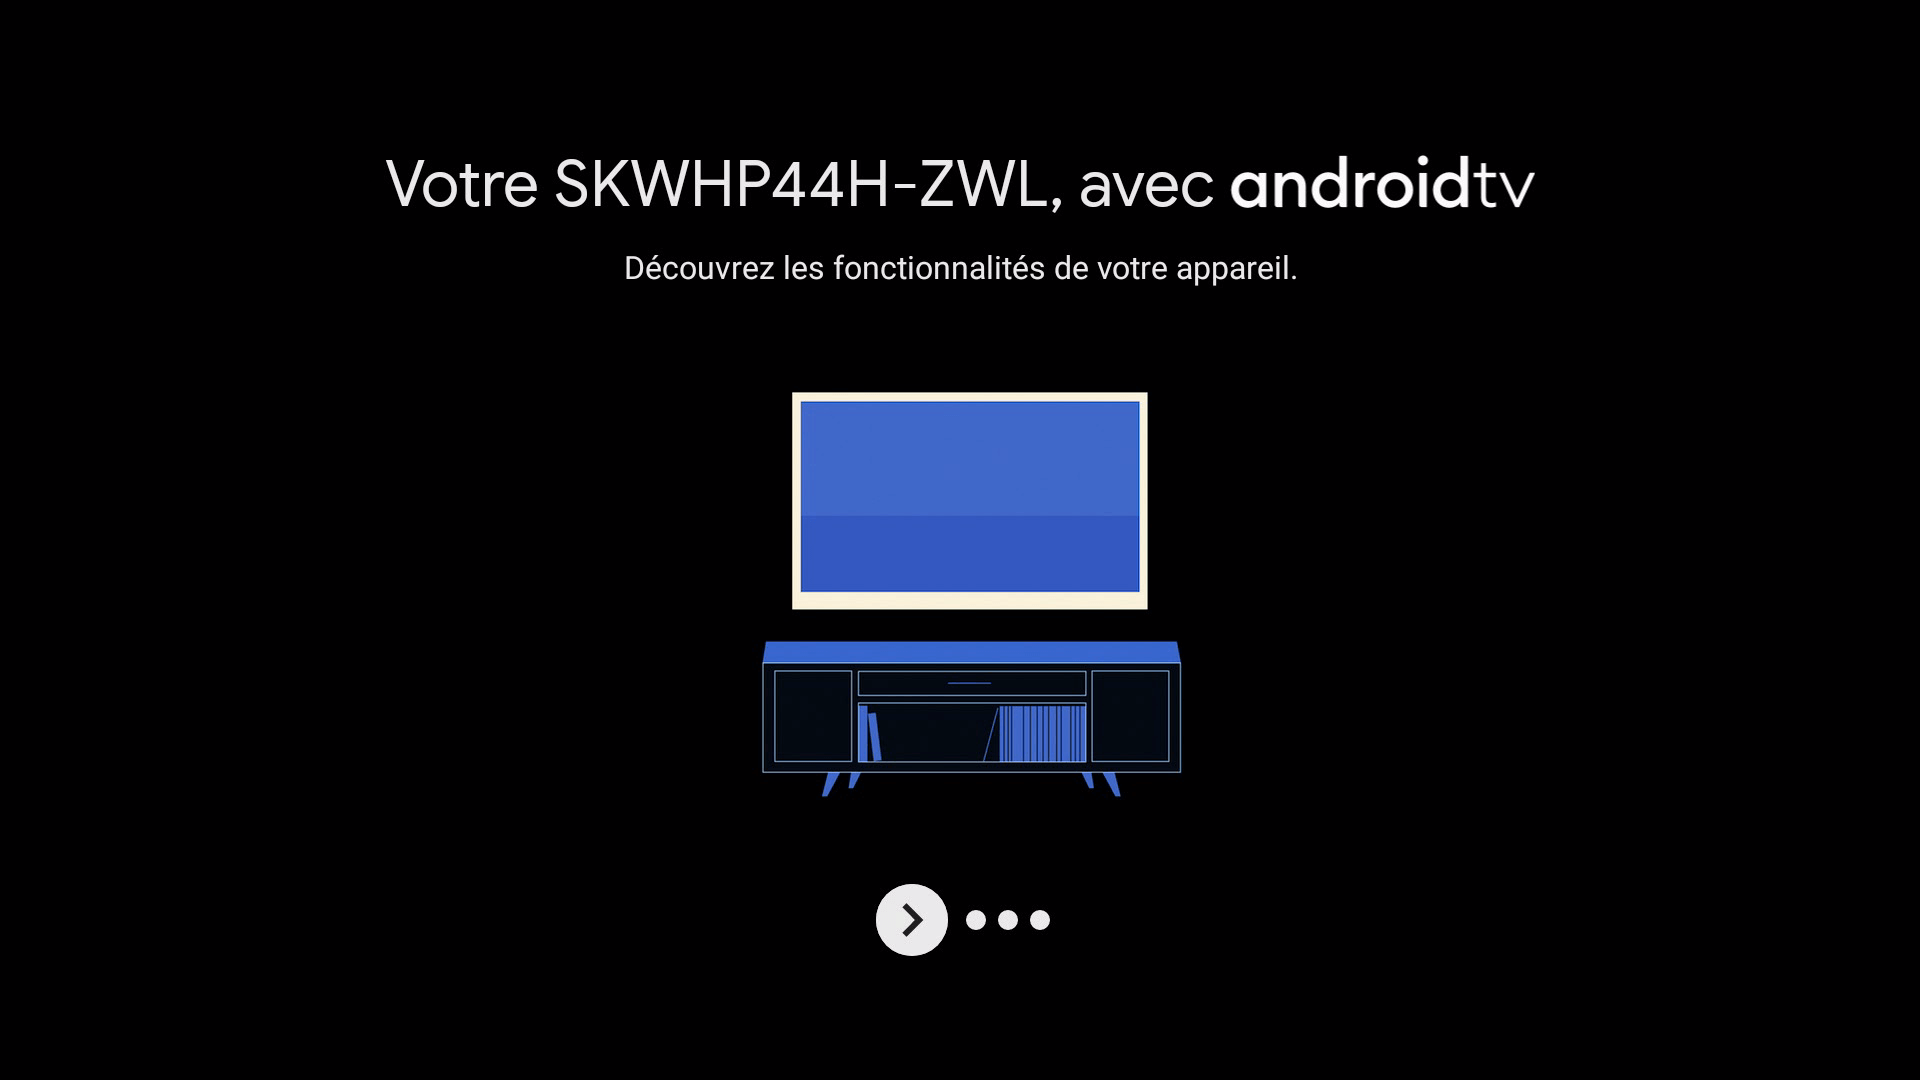
Lors de la dernière étape du processus de configuration, vous avez la possibilité de vous familiariser à nouveau avec les fonctionnalités clés, étape par étape.
Resetting your TV Box to factory settings erases all data and restores the device to its original state. This can help resolve major system issues or prepare the device for reuse.
Follow the steps below to reset your TV Box to factory settings.
- Press the Settings button
 on the remote control or from the main menu.
 - Select “More” under Settings and press the OK button.
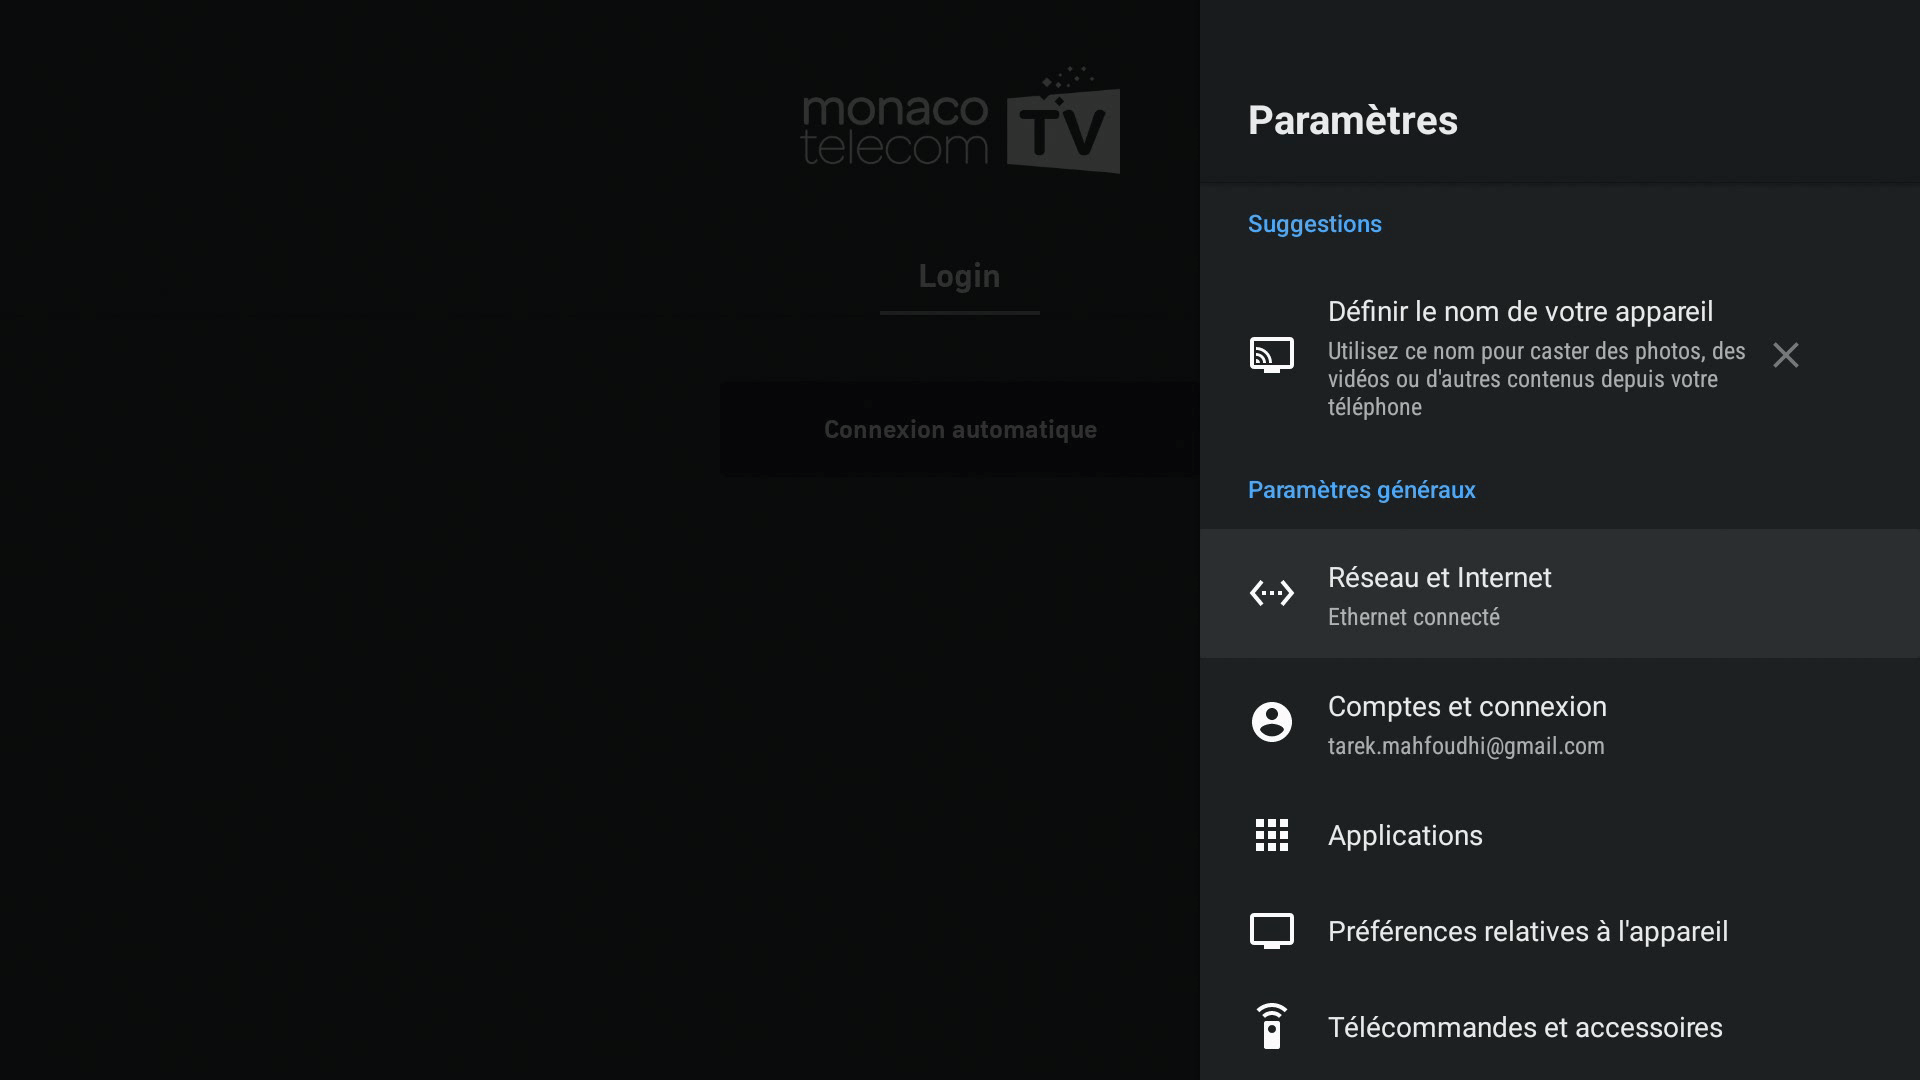
Now select “Device Preferences” and press the OK button.
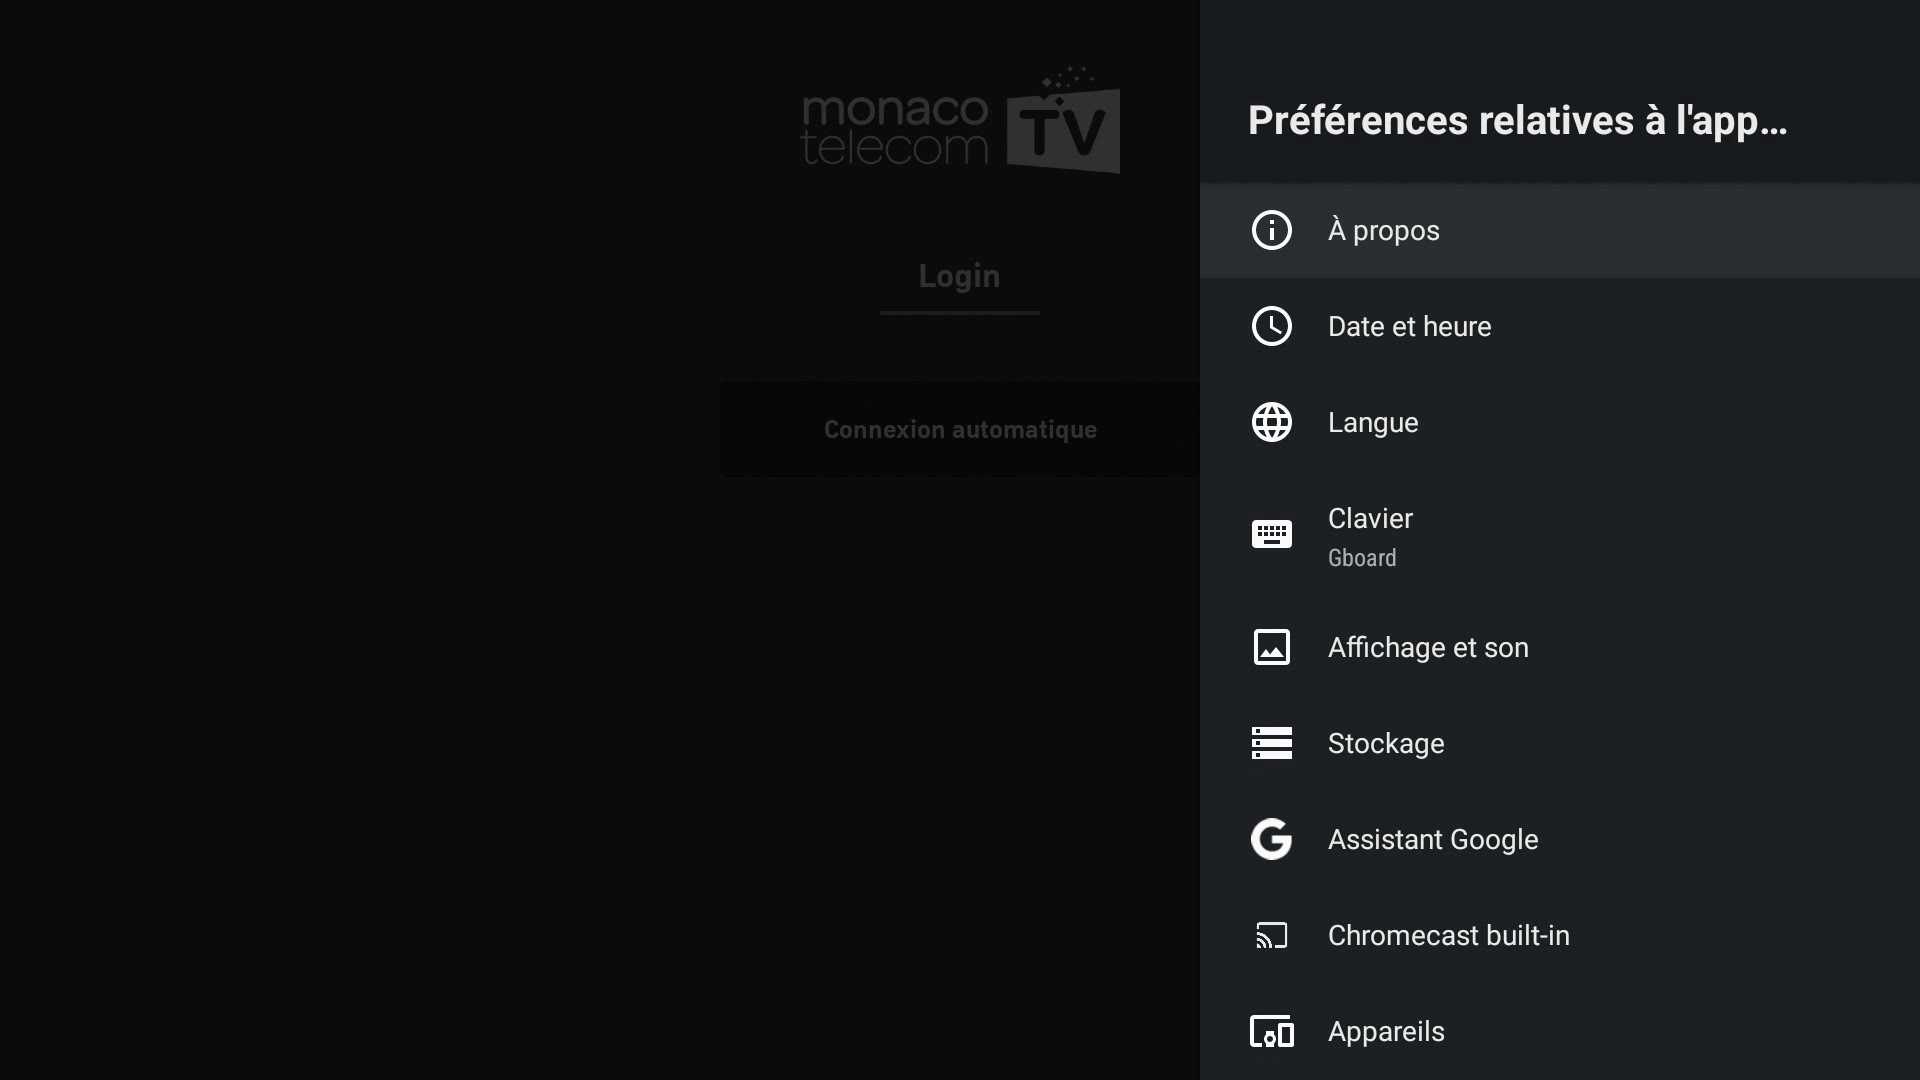
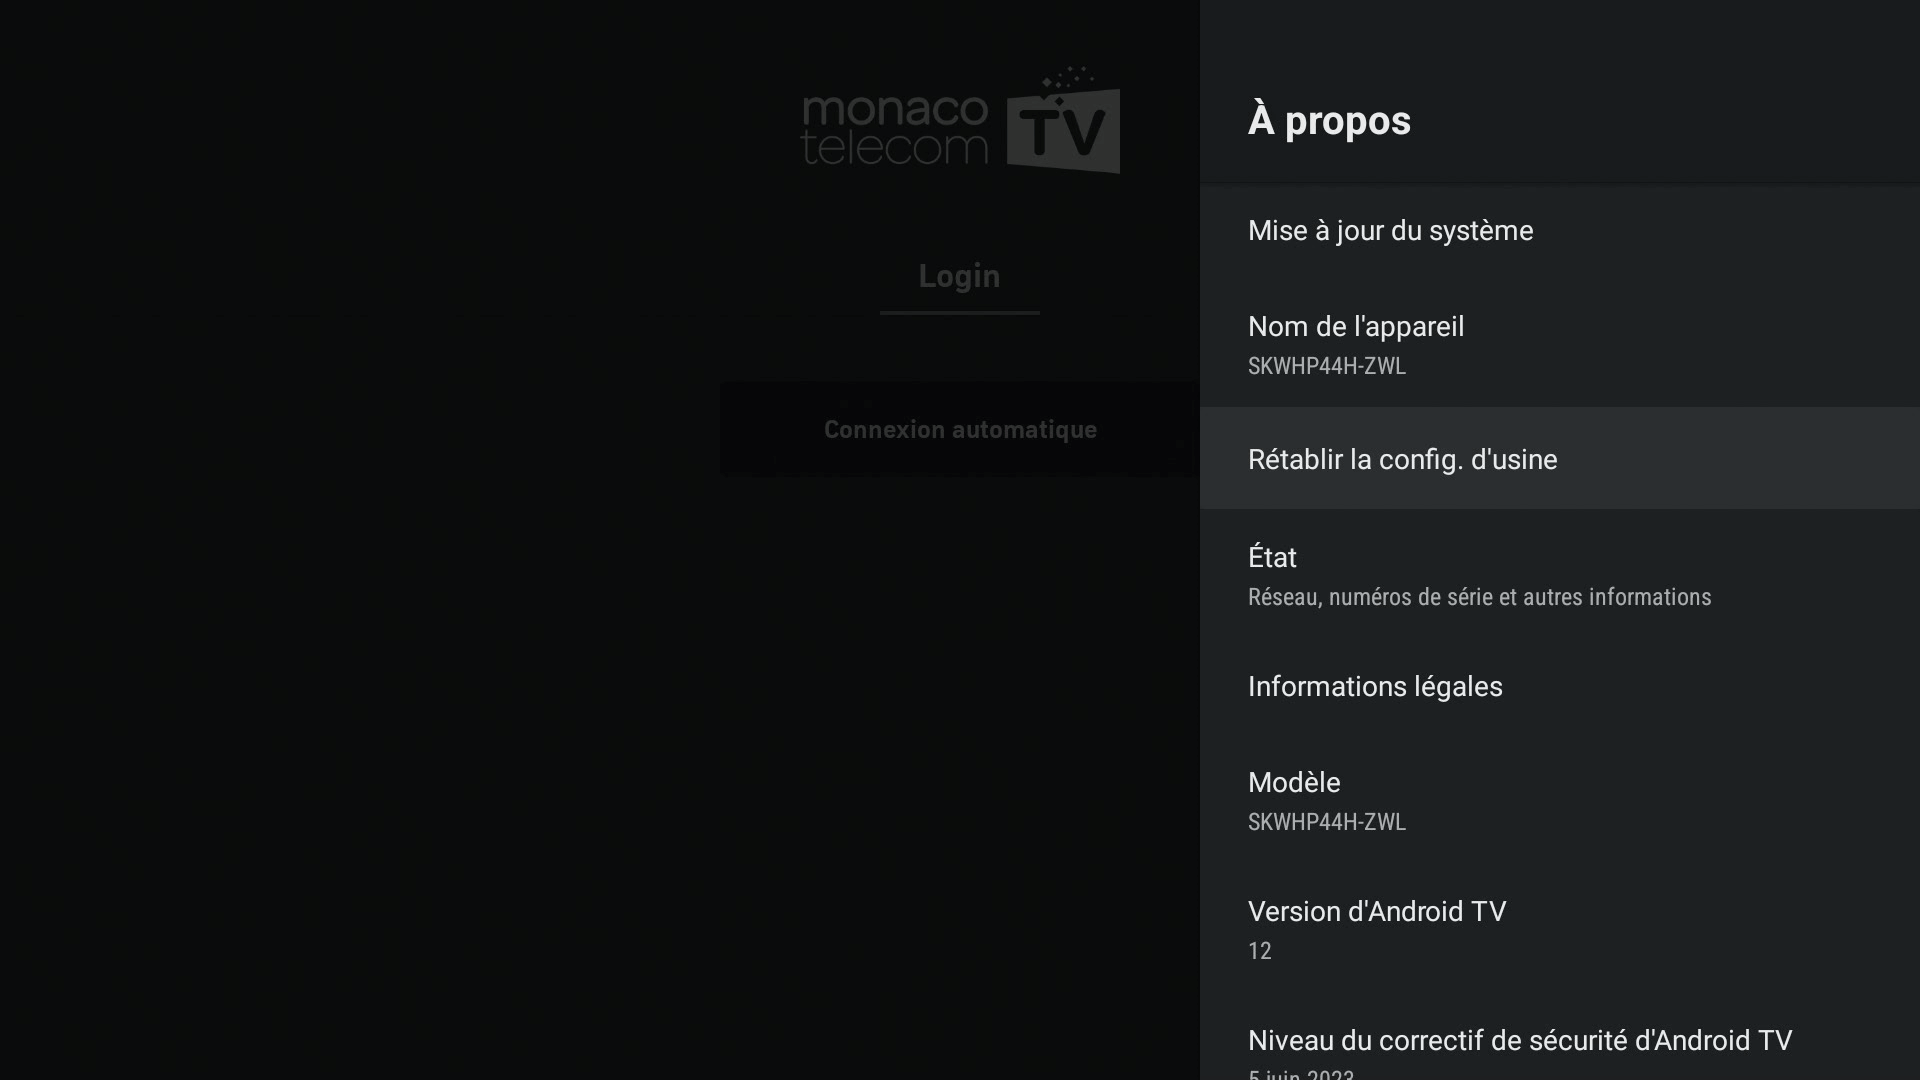
Select “About” and then “Factory reset”.
Confirm that you want to reset the TV Box. The factory settings will be restored.

See “First installation” > “Initial setup” to set up your TV Box again.
If your Wi-Fi password changes or if you want to connect your TV Box to another Wi-Fi network, you can adjust this setting via the device settings.
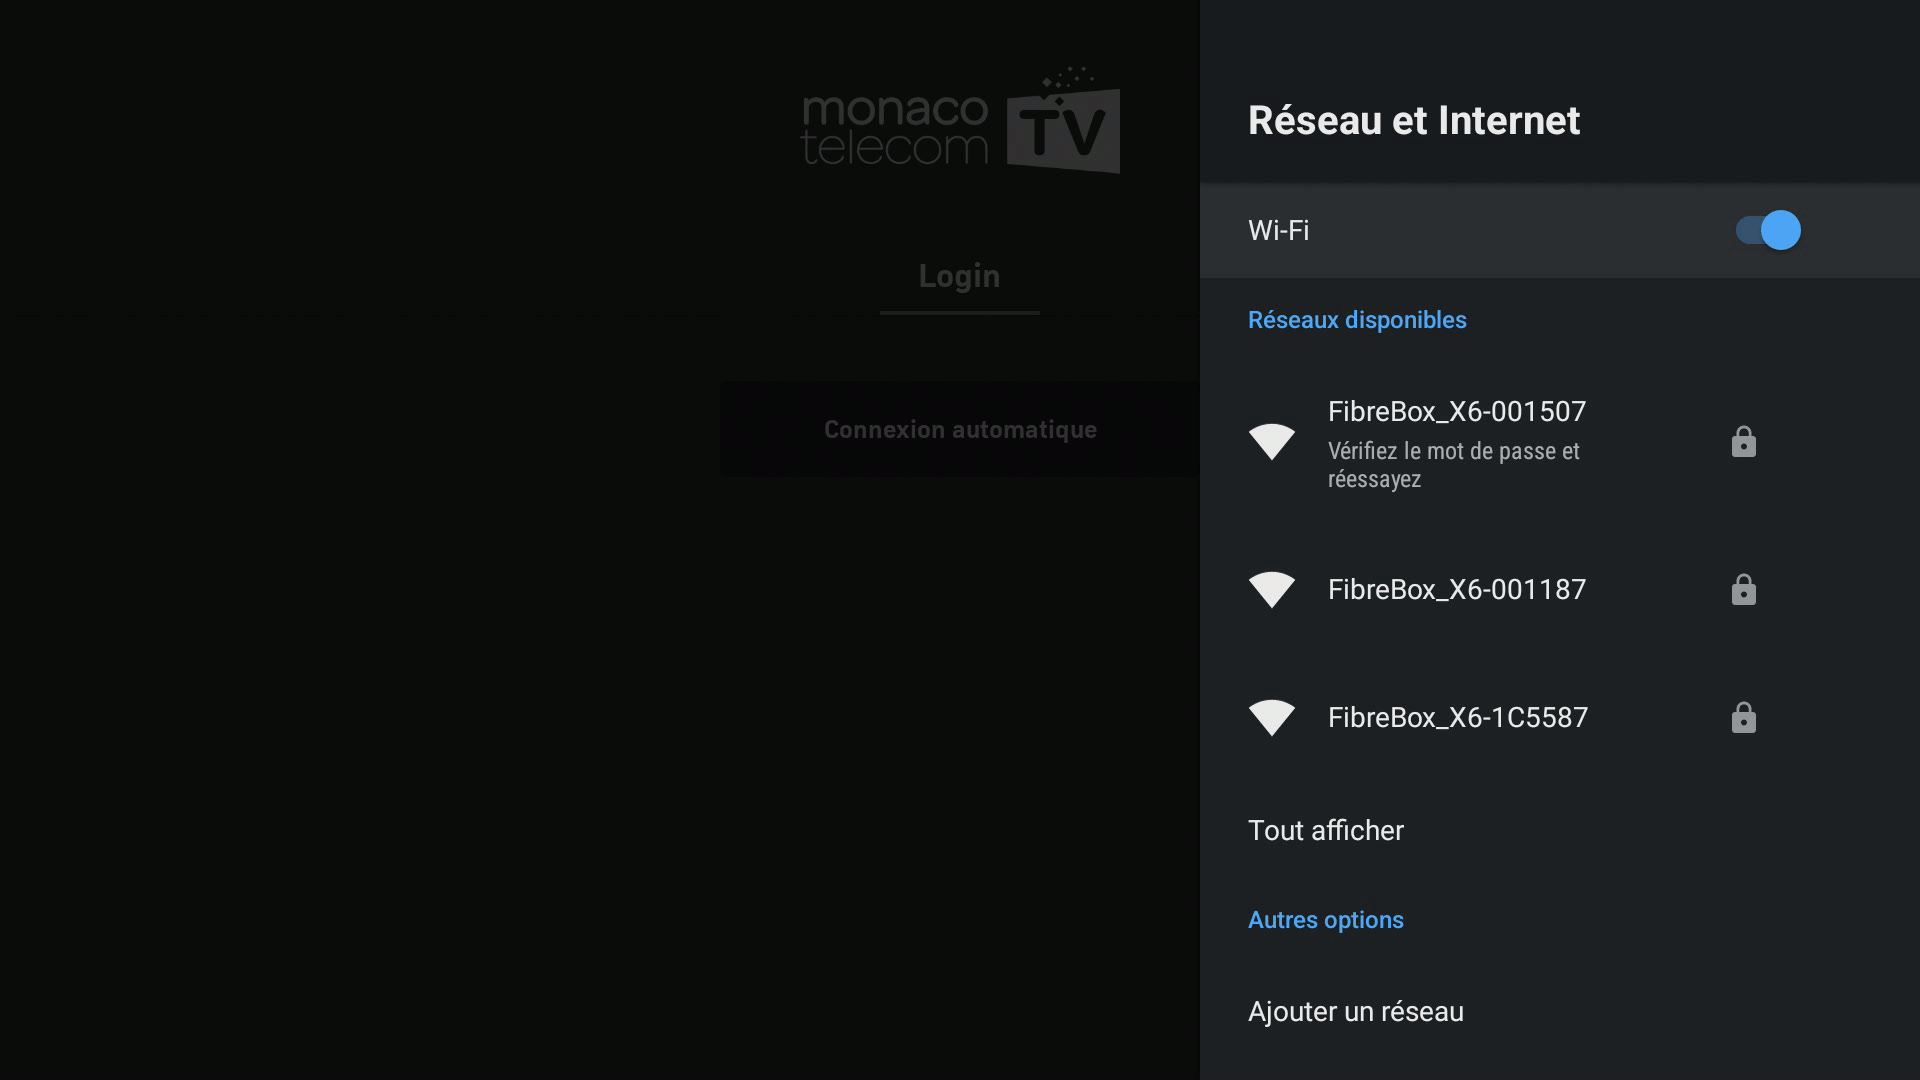
- Press the Settings button on the remote control or from the main menu.
- Select “More” under Settings and press the OK button.
- Select “Network & Internet” and choose the desired network from the list.
If you experience an issue with your TV Box and contact our support team, you may be asked to provide the serial number or the software version of your MonacoTelecomTV application.
To retrieve this information, follow the steps below:
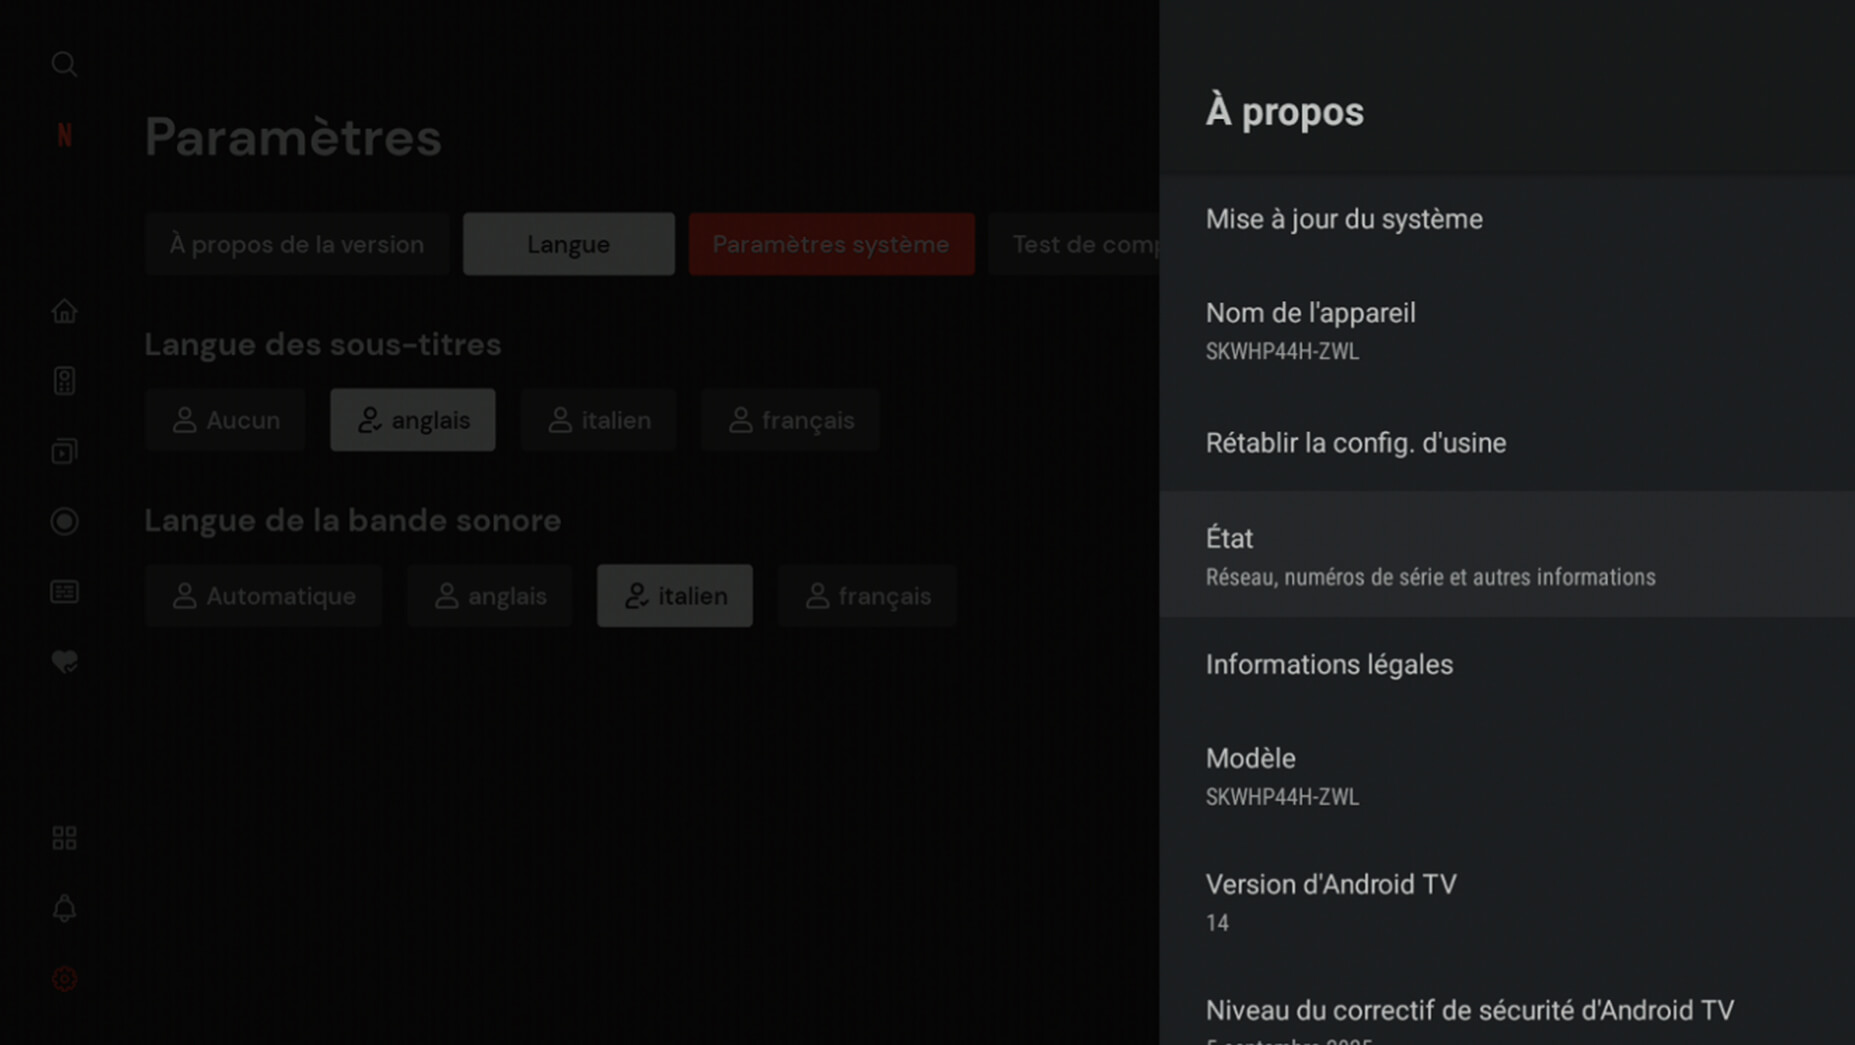
- Press the Settings button on the remote control or from the main menu.
- Select “More” under Settings and press the OK button.
- Select “Device Preferences”.
- Select “About”.
- Then select “Status”.
- In this menu, you will find your device’s serial number as well as the current version of the operating system software.
